


Not Updated For Current Season
This guide has not yet been updated for the current season. Please keep this in mind while reading. You can see the most recently updated guides on the browse guides page
x
 Comprehensive Samira Guide (ADC, Bruiser, Jungle, & Supp
 Build Guide By QueerJunk
Follow


12
1
 56,052
Views
56,052
Views
 3
Comments
3
Comments
12
1
56,052
Views
3
Comments
Samira Build Guide By QueerJunk
56,052
Views
3
Comments
Samira Build Guide By QueerJunk
Follow
x
Did this guide help you? If so please give them a vote or leave a comment.
You can even win prizes by doing so!
Vote
Comment
I liked this Guide

I didn't like this Guide
 Thank You!
Your votes and comments encourage our guide authors to continue
creating helpful guides for the League of Legends community.


Runes: Personal Preference
1
2
3

Domination


Precision


+10% Attack Speed
+6 Armor
+6 Armor


Spells:
1
2
3
Defensive
![LoL Summoner Spell: Barrier]()
![LoL Summoner Spell: Flash]()

Barrier

Flash


Items


Threats & Synergies
 Threats
 Synergies
Extreme
Major
Even
Minor
Tiny
 Show All
None
Low
Ok
Strong
Ideal
Extreme Threats
 Ideal Synergies
Veigar
The highest statistical counter. His E makes it difficult to dash around, and if he CC's you, you're going to get 1shot. AVOID THE RAGE CAGE!


Swain
Both of you have bonus interactions against champions who have been CC. Swain also provides that CC with his E.


 Synergies
Ideal
Strong
Ok
Low
None
Swain
Both of you have bonus interactions against champions who have been CC. Swain also provides that CC with his E.


Champion Build Guide
Pros & Cons
|
PROS
+ Insane Burst & Mobility + Can easily end the game with most damage dealt. + Flashy Combos, + Fun, Engaging, Spammy Hardcarry Playstyle + Ult has no CD & Samira is flashy, deals tons of damage, and has resets which makes her a pentakill champion. Once you learn how to combo properly you dealsomuch damage. |
|
CONS
- Very Squishy - Cannot cast - Easy to misposition - Needs to land skill shots consitently to be effective. Samira is very squishy, and |
|
|
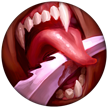
Daredevil Impulse (Passive) |
The passive that defines the playstyle. It contains 3 major components. First your melee attacks deal significant bonus damage based on your target's missing health. Second, you briefly knock up champions who are already immobilized and dash towards them(dash distance increases per level). Lastly, Samiras style increases for each unique hit, allowing her to cast her ultimate once she reaches S grade. Their are a total of 6 "style grades" and each grade grants additional MS. In order to gain a grade, you need to weave your auto attacks and abilities together. Spamming auto attacks or the same ability will not gain you stacks, even if you hit different champions. |
- Since ascending grades grants bonus MS, use the extra mobility to chase kills or escape fights as necessary.
- Grades reset upon casting

- Your dash range increases based on level.
|
|
Flair (Q) RANGE: 950 COST: 30 COOLDOWN: 6 / 5 / 4 / 3 / 2 |
The easiest way to gain stacks of
This ability is a skillshot and missing it will significantly delay your first cast of |
- Both iterations of the spell can crit.
- When cast with
Samira strikes her dash path instead of shooting or slashing.
- The melee version has an AOE damage radius, use it to farm or hit multiple champs at once.
- Your
combo can be cast during
|
|
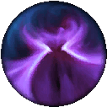
Blade Whirl (W) COST: 60 COOLDOWN: 30 / 28 / 26 / 24 / 22 |
Essential for building stacks of
This ability is similar to |
- This is your all-in tool, without it it will be difficult to stack your ult and survive in combat.
- Should be used offensively for damage & stacks, as well as defensively,
|
|
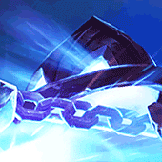
Wild Rush (E) RANGE: 600 / 650 COST: 40 COOLDOWN: 12 / 11 / 10 / 9 / 8 BONUS ATTACK SPEED: 30% / 35% / 40% / 45% / 50% |
Can be cast only on champions, both on both allies and enemies. Deals damage to the units dashed through and provide bonus AS the scales. The cooldown is refreshed upon killing an enemy champion, which means unlike
You should use this ability as often as possible while weaving in auto attacks to quickly stack Reckless Impulse so you can spam |
- Remember to use it on allies to escape death when necessary!
- Use while split pushing to kill turrets faster with the bonus AS!
- Can be used to jump over walls if used on jungle creeps and champions near walls similar to
|
|
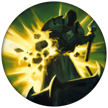
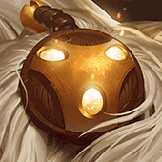
Inferno Trigger (R) RANGE: 2750 COST: 100 |
Insane AOE damage with literally no cooldown, and tons of lifesteal. However it cannot be cast until you reach S grade on Reckless Impulse. The damage and channel are similar to
The damage is nutty, and the sustain it provides is nothing to scoff at. To make things even better it can crit for even more damage! |
- Make Sure You aren't CC'd while channeling!
- You can cast
while channeling, for optimal positioning.
- The damage cannot be body blocked, it goes through walls and damages all targets in the radius equally, damage is NOT reduced for hitting multiple targets.
- Hits invisible units.
Samira is a "combo" based champion by design. It is literally impossible to use her ult without "comboing". I am simply referring to gaining stacks of your passive, these tips N tricks will help you stack it as fast as possible and are great to try in the practice tool before playing Ranked!
You need to auto attack before and after landing a spell in order to properly stack your passive quickly.
Base Combos
AA +
+ AA
+ AA +
+ AA
+ AA +
+ AA +
+ AA = Ult
AA +
+ AA +
+ AA +
= Ult
While the previous combos will be how you stack your Reckless Impulse consistently, Samira truly shines when using her combining her combos together, you also want to weave in your
+ AA combo on every reset to stack as quickly as possible. For Example:
+ AA +
+ AA +
= Ult
You need to auto attack before and after landing a spell in order to properly stack your passive quickly.
Base Combos
AA +
AA +
While the previous combos will be how you stack your Reckless Impulse consistently, Samira truly shines when using her combining her combos together, you also want to weave in your
|
|
|
Learning how to itemize properly is essential. Every character has their "cookie cutter" build, but learning what situations should make you prioritize one item over another can definitely help you carry your games harder and more consistently. You should build based on the pace of your game and how hard you feel you are carrying.
|
|
Crazy expensive, but insanely worth it! Finishing this item is a major power spike since it synergizes so well with Inferno Rush. I often rush this item, and once it's complete I know I can 1shot any squishy from full health with a proper combo. You can still burst without this item, but killing tankier targets will be difficult if you opted for more survivability. The single item that grants Samira the most damage for gold spent. |
|
|
Also very expensive, but also very strong. If you are comboing correctly it is impossible not to proc sheen which creates explosive burst on squishy targets. The CDR enables you to combo even faster which makes
|
|
|
You have quite a few options when it comes to boot upgrades.
|
|
|
Often your second item after your first major damage item. Provides stronger sustain then
|
|
|
Provides the Crit and MS you need and has a bonus shield to boot! Synergizes insanely well with
|
|
|
A core item for the bruiser build, since it provides health and AD. The slow however is almost wasted on Samira, since you have such insane mobility with
|
|
|
The 2nd item in the bruiser build. Provides even more health, some MS, and a bit of damage. Once you complete this you will be a beefy babe and can 1shot most squishes while having 3k health. You will be lacking damage, so if you aren't tanking or dying frequently you should considering itemizing into damage after finishing your core. |
|
|
Flat out required against champs with tons of sustain like
|
|
|
Buy this item against
|
|
|
Dying too much? Have too much leftover gold? A great choice that provides strong defence & offence. Not worth rushing but can be incorporated into almost any build late game. |
|
|
A fine choice that gives you infinite mana upon completion as well as decent damage , crit, & CDR. Considered Meta however I find it lackluster when compared with
|
|
|
Samira's second Meta item. Provides strong damage and decent defense. It is difficult to decide which is more effective defensively when compared with
|
|
|
Getting bursted by AP? Is
|
|
|
The best jungle enhancement since it provides both CDR & AD which are primary stats. Samiras damage isn't purely auto based so the extra autos on
|
|
|
The go to support item for damage dealers. You can take
|
|
|
Built primarily for the anti-warding utility. The lethality isn't wasted but isn't' ideal since crit and CDR grant you access to more damage. That being said you should have no problem with squishys when building lethality and late game you should be able to compensate for your missing damage in your build. When playing support warding is your top priority, even over damage, a utility based purchase. Makes it so you 1 shot wards and 2 shot red wards so contest them aggressively. |
Vision is an essential part of carrying in the late game. By securing vision you make it easy for assassins to catch unsuspecting pray, you avoid confrontations where you are outnumbered, and you give you team vision of bushes so enemies cant use them to hide. So I created this image to help illustrate the idea that where you should be warding independent on what state your game is in. Warding as a carry is much easier then as a support since their is literally a maximum numbers of wards you can place per game. Keep your trinket on cooldown at all times & drop red wards frequently and you should be good.
"Standard Wards" should be taken when the lane is even.
"Defensive Wards" should be taken when you are behind, and
"Aggressive Wards" should be taken when you are pushing their base or turrets.
Make sure your upgrade your warding trinket to blue at level 9. Any spot designated for a yellow ward can be used as a control ward, and you should be making this decision based on how often and where your allies are warding. When warding you want to be trying to think ahead, and predict where teamfights will be breaking out. Securing vision before a baron or dragon can have a massive impact on the outcome of the skirmish. You want to try and ward as you are roaming/already running through the enemy jungle, try to be as efficient as possible!
|
|
|
|
|
Provides range wards that never expire! Use it to check if enemies are on important objectives, to avoid facechecking a bush, or just to get a long last ward. You should take this upgrade in a majority of games, unless your team doesn't have enough scanners and you want to control bushes to catch people out. |
|
|
Use the active as you roam through the enemy jungle or the river. It can also be used defensively when you roam through your jungle if the opponents just backed after a large push. Their are commonly warded spots like the bushes to river/jungle in your lane that you should always scan to check for wards. Use this item as often as possible in the correct context, clearing out enemy wards is a great way to increase your vision score! Which you should be aiming to get as high as possible every game! Not required when building ADC, but preferred when playing Jungle, Support, or top. |
|
|
Flash over walls to get the most out of this spell. Flash to dodge big CC like
|
|
|
A strong alternative to
|
|
|
Grants access to even more damage that will help with your all-ins. The problem is that when played properly Samira does enough damage without needing
|
|
|
A great choice in the bot-lane! Makes your all-ins against enemy ADC's devastating, and has more late game utility then
|
|
|
You usually take Heal when you are going ADC. Grants bonus MS and extra sustain to your lane partner. A strong choice when in the duo lane with less all-in potential then
|
|
|
Barrier is a strong choice and excellent for when you want to dive straight into the enemy team. Grants you extra durability to get off an extra
|
|
|
Literally required when going jungle. You can build into either blue or red smite based on preference. A required summoner spell for jungling, that must be mastered in order to be utilized properly. |
|
|
Very strong against comps with heavy CC such as
|
Thanks!
Please let me know what you think and any feedback you have on how I can improve the guide! Thanks For Checking Out My Guide! Let Me Know What You Think Or If You Have Constructive Criticism In The Comments!
I Stream Daily On Twitch
My Instagram
My YouTube Channel
My Twitter
My Senna Guide
My Nami Guide
My Lulu Guide
I Stream Daily On Twitch
My Instagram
My YouTube Channel
My Twitter
My Senna Guide
My Nami Guide
My Lulu Guide


 YouTube
 Twitch
You must be logged in to comment. Please login or register.