My permanent ban. Olaf is damn annoying. His axe slows you, and if he picks it up, you have hardly any chance to escape. He has damn good self-healing and true damage, which hurts a lot when you're caught in his slow. But the worst thing about him is his ultimate. You can no longer influence him with crowd control. Mega Gnar's W and ult are useless against him. It is probably wiser to confront Olaf's ult as Gnar.
Nasus
A pure torment. Once caught by the slow, your end is near. Stay at a distance until you have a jump. You can try to disrupt his farming, but doing so successfully will be difficult. Force a 2v1 situation and freeze the lane in front of your own tower. Antiheal is recommended, but generally, you shouldn't engage him. Therefore, early antiheal is rarely worth it.
Gwen
I still want an anti-heal magic resist item... Gwen is a challenging matchup. Her W prevents you from poking her from a distance, and if you try to engage in melee with Mega Gnar, she will annihilate you with her true damage and self-healing. Try to focus on farming and harassing her with your Q whenever possible. Wait for assistance and make sure not to die.
Irelia
It is possible to win against Irelia, but maintaining the lead is incredibly difficult. Watch out for her Q, as she will use it on dying caster minions to quickly dash towards you. Keep your distance and don't let her annoy you! Your only chance to kill her is to poke her down and finish the job with Mega Gnar, but be cautious because one mistake and you're dead. Once you fall behind, it's game over, so hope that your teammates are doing better.
Rengar
MEEEEEEEOOOOOOOW or rather RRRRRAAAAAWWWWWWWRRRRR. Honestly, let him push. Keep your minions close to your tower and position yourself on the far wall, as seen from the bush. He will jump on minions to last-hit them, which is your chance to trade. When Rengar jumps on a minion, try to proc your W on him, but don't get too close. Once he goes back into the bush, he can jump again. Once he reaches level 6, stay close to your cozy tower. Try to wait with about 90 Rage, for Rengar snacking on your minions and then jump directly onto him while using Q in mid-air. As Mega Gnar, ult him away from the bushes and use W. Don't let him reach the bushes! Long story short: stay at the tower, wait for help, trade when he kills a minion. If you engage as Mega Gnar, keep him away from the bushes and don't die, please.
Sett
Stay at a distance from Sett. Avoid getting hit by his pull ability and don't underestimate his true damage in the middle area of his W. If he gets ahead, it will be very difficult for you to do anything. As Mega Gnar, you shouldn't engage without your jump ability, as you won't be able to escape from him afterwards.
Vayne
Pray that she and your jungler like you. Even though Vayne has a relatively short range, she still has more range than you. Avoid getting poked and wait for assistance. Be careful not to stand near walls. If she's low on health and you're close to transforming into Mega Gnar, you can engage, but keep in mind that she can push you away and potentially use her ultimate to go invisible. Don't underestimate her true damage.
Darius
Stick to short trades. Do not allow yourself to be fully stacked by him. Dodge his Q by staying in the inner circle and then jumping away. Always try to keep him at a distance and wait for assistance.
Malphite
I'm not sure if it's me or Malphite, but I find it extremely challenging and difficult to win against Malphite. That being said, Malphite's Q steals Gnar's attack speed and movement speed, which are two of Gnar's most important attributes. So, make sure not to get hit by it, although it's certainly not difficult with a point-and-click spell... *sarcasm off*. You can try to trade with Malphite, which is possible as long as his Q is on cooldown. However, keep in mind that after using Q, he will simply walk up to you and abuse his other spells, causing you to lose some trades. Focus on farming minions and throw a Q whenever he tries to engage you. It's easier as Mega Gnar. If your Malphite builds ability power, engage immediately and try to kill him. If he goes for a tanky build, you'll hardly have a chance to win the trade. Watch out for his ultimate.
Ornn
When facing Ornn, it can feel as frustrating as with Malphite. It seems like it should be straightforward, but somehow it never works out, atleast for me. Avoid getting slowed by his Q, as it sets up Ornn to knock you up. Also, stay away from walls to prevent him from knocking you up. Don't get within range of his W, and definitely avoid getting caught in a CC chain. As Mega Gnar, you can engage, but keep in mind that you're up against a tank with plenty of CC.
Aatrox
As against most melee champions, Gnar has an advantage in the first three levels, but it becomes challenging against Aatrox. Do not underestimate his self-healing and damage, and pay attention to his summoner spell. Let him push the lane and try to force a 2v1 situation. Only trade if you are confident that you can dodge Aatrox's abilities or if they are on cooldown. Buy anti-healing items early on. If Aatrox catches you, it becomes difficult to create distance without a jump.
Sylas
If you know what you're doing, it's not much of a problem to win against Sylas. Pay attention to his and your ultimate, as Sylas can directly use Gnar's ultimate. Try not to get hit by his crowd control, and everything should be fine. It's also advisable to buy antiheal relatively early. I wish there was a magic resist antiheal item.
If you fall behind once, it's difficult to recover, so wait for a 2v1 situation and focus on farming.
Teemo
Stay outside of his Q range and don't let yourself get poked. Let him push towards you and try to get as much CS as possible using your Q. Try to adjust your Rage so that you have around 80 Rage just before reaching level 3. Go for an autoattack + Q combo and create distance until the blind expires. Once the blind is gone, try to trigger your W and engage with your E, ideally transforming into Mega Gnar and being able to kill Teemo. If you fall behind once, it's difficult to recover, so wait for a 2v1 situation and focus on farming.
Camille
Another straightforward matchup if you know what you're doing. Don't get hit by her leap, otherwise you'll lose the trade 100%. Try to always keep her within autoattack range. If she gets too close, immediately jump out. If you fall behind once, it's difficult to recover, so wait for a 2v1 situation and focus on farming.
Dr. Mundo
It's difficult to kill him since his Q slow makes it hard to catch up or to get away from him. Stay behind minions, but be mindful of his E. Only trade if you can intercept his Q with a minion or if his abilities are on cooldown. Keep in mind that Mundo's Q has a low cooldown.
Jayce
It is exhausting to play against Jayce. You constantly have to watch out for his empowered shot or if he wants to engage with his melee form. Dodge his Shock Blast and poke back afterward, bait out his abilities, and keep an eye on his mana. As Mega Gnar, you can engage, but remember that he will immediately knock you away. I can only repeat: bait out his abilities and then trade.
Ryze
There isn't much you can do against a Ryze. Once he reaches his pushing potential, it becomes nearly impossible for you to do anything other than clearing minions. If the Ryze is more passive, try to make him waste his mana and dodge his Q. Avoid engaging as Mega Gnar, as he will root you and escape. From level 6 onwards, you can try to kill Ryze if you land your full combo or if the Ryze is playing poorly.
Akali
Akali is very squishy, but her enhanced auto-attacks and three dashes make it difficult to kill her. Do not underestimate her damage. Wait for assistance or try to poke her down with safe trades. As Mega Gnar, it is challenging to keep her pinned down in one spot. If you manage to do so, retreat after your combo.
Fiora
Fiora is the definition of anti-tank. Do not underestimate her true damage and avoid engaging in duels with her. Buy anti-healing items early and poke her from a distance. As Mega Gnar, be mindful of her Riposte. It's best to bait out her Riposte with your Q animation and then engage her once it's on cooldown.
Illaoi
If Illaoi gets ahead, there's not much you can do. Once her E is on cooldown, you can engage. Avoid her tentacles to prevent her from healing herself. You can safely destroy her tentacles from a distance while baiting out her E. If Illaoi uses her ultimate, immediately disengage and wait for the ultimate to expire. Avoid getting help from your jungler. In my experience, junglers often struggle to deal with Illaoi, and attempting to fight together often leads to both of you dying.
Kled
Kled can be quite annoying. He will constantly throw his Q at you and wait for you to get too close. Avoid getting hit by his Q and try to trade from a distance. As Mega Gnar, keep in mind that Kled has two forms and is very mobile. If Scarl has run away, don't let Kled deal damage to you. Also, try to prevent him from executing minions. Keep an eye on his indicator. Let him push the wave and wait for assistance. It's difficult to kill him alone, but don't let that discourage you from trying.
Tahm Kench
You can try to kill Tahm, but you'll either get devoured or whipped to your death with his tongue. Your best chance is to poke him with your Q and avoid getting into melee range. Keep his shield in mind and don't forget that he heals himself with every Q hit. Also, don't let yourself be caught off guard by his W from behind.
Trundle
Don't let yourself get slowed by his Pillar, as it can be very painful. Stay at a distance and poke him low with your Q. Buy anti-healing items early and trade as often as possible. Once he's low on health, try to bait out his ultimate. If his ultimate is on cooldown and Trundle is low, you can engage him as Mega Gnar.
Wukong
Don't try to play with the Monkey King, he tends to win trades. Instead, try to poke him with your Q and then trigger your W when he goes for last-hitting minions. As Mega Gnar, be cautious of his clone and his knock-up.
Rumble
Damn, damn, damn, that burns. Unfortunately, his flamethrower has enough range to hit you while you're auto-attacking him. So, keep your distance and only engage in trades when his flamethrower is on cooldown. Remember that his E has two charges and an extremely long range. Additionally, he gains movement speed through his W, making it difficult to end up as his BBQ. Furthermore, a well-placed ultimate prevents you from moving from the spot. Try to poke him as much as possible and trade when his Q is on cooldown. If he's low and you're about to transform into Mega Gnar, you can engage. However, be aware that he will defend himself, and he quite literally burns down your health bar.
Yorick
To defeat Yorick, you must become a Yorick yourself. So start learning how to resurrect the dead. Just kidding! As Gnar, it can be challenging to beat Yorick, especially once he has his Maiden summoned. Avoid getting hit by his E to avoid dealing with his gang. Save your jump ability for escaping his cage or for emergencies. Do not engage in a duel with him and focus on farming minions instead. Remember, you're Yorick!
Gangplank
Everything is fine as long as he doesn't constantly bombard you with his Q. If that's the case, treat him like a Teemo. Otherwise try to destroy his barrels before he does and trade aggressively, but don't let his passive hit you, as it hurts. Once you're close to Mega Gnar, fake an engage to make him use his barrels. Now, if possible, engage with your E.
Kennen
Even though Gnar is a ranged champion, he has the shortest range among ranged champions in the top lane. That means Kennen will poke you. Treat him like Teemo, but not as defensively. Dodge his Q and don't get caught off guard by his E. As Mega Gnar, you should engage when Kennen is low on health or when his Q is on cooldown. Try to trade as often as possible if you feel confident doing so.
Urgot
It's actually quite simple to deal with Urgot. Dodge his pull ability, preferably using your jump, so you can trade with the bonus attack speed. Pay attention to his area damage and make sure not to get hit by his ultimate at any cost. As Mega Gnar, you only want to engage if you know he doesn't have his ultimate or if your jungler is with you.
Sejuani
Sejuani can be a threat if she gets 4 stacks on you, so don't allow that to happen. Otherwise, poke her from a distance and avoid getting hit by her crowd control. As Mega Gnar, you should also avoid getting hit by 4 autoattacks or spells, as it becomes difficult to escape once you're caught in her crowd control chain.
Mordekaiser
Playing against Mordekaiser can be a love-hate relationship. You can manage well, but sometimes you just want to kill him and can't. Avoid getting caught by his pull and poke him as often as possible. Rush QSS (Quicksilver Sash) and laugh at him when he ults you. If you notice that Mordekaiser is reading you like a book, try dodging in the opposite direction than usual or incorporate random movements into your gameplay. If you're really struggling against the mighty Kaiser, let him push you and ask for assistance. Ping your QSS if you have it.
Riven
Actually, playing against Riven is relatively straightforward, as long as you don't, like me every time, underestimate the damage of her ultimate. Keep your distance, as Riven has many ways to close the gap. Once Riven has used her second Q or is within range for one of her E+W combos, be prepared to throw your Q or, if in doubt, jump away. Trading with Riven can be challenging due to her shield and mobility. Try to read her movements, interrupt her engages, and punish her accordingly.
Warwick
The big bad wolf always has a nasty surprise, whether it's his passive combined with his Q, his E, or even his ultimate. But if you pay attention to a few things, the big bad wolf can become quite tame. Keep your distance and avoid getting hit by his Q, as it only heals him unnecessarily. Avoid his fear, which should go without saying. Trade him down until you have the opportunity to take him out with a Mega Gnar CC chain. It's possible that if Warwick survives the CC chain, he will overpower you with his self-healing, and you'll meet your demise. You can also use your jump to force him under your tower while he's using his Q. This is particularly effective when combined with Mega Gnar's ultimate. Don't forget to apply anti-healing effects as well.
Sion
It depends on the Sion on how the matchup goes. If your Sion manages to catch you in his Q every time, it will be a difficult game. If he can't manage to do so, you have a free pass. Don't let yourself get knocked up. Don't be afraid of his shield. If there's no minion in front of him and he activates the shield, usually a Q + W combo is enough to break the shield. Watch out for his E, don't let yourself get hit by your minions. As Mega Gnar, you shouldn't have any problems, but you should bait out his shield before engaging. One more thing, turn on the sound.
Volibear
Volibear's chain lightning can be quite annoying, but otherwise, you shouldn't have much trouble against him. Use your Q to prevent him from engaging. If he engages with his ultimate, jump away. As Mega Gnar, keep in mind that he can heal himself and use his ultimate to disengage from your engage.
Kayle
Kayle is relatively easy to handle. As long as she doesn't have range, you can poke her freely. Be cautious of her slow and always engage as Mega Gnar. However, let her push the wave and keep the minions close to your tower to give your jungler a chance to gank. Once she reaches level 6, not much changes except for her range. Avoid getting poked, trade her down, and engage as Mega Gnar. Dodge her AoE damage from her ultimate.
Pantheon
Pantheon is an easy matchup for Gnar. Dodge his Q, don't let him block your Q with his shield, and attack him from behind if his shield is active. Trade as often as possible until Pantheon is low and then engage as Mega Gnar. He shouldn't stand a chance. If, for some mysterious reason, he manages to get ahead, wait for assistance or try to ult him under your tower.
Singed
Playing against Singed can feel quite strange. Your best approach is to ignore him. Whenever he comes near you, back off kiting and focus on farming minions. Avoid stepping into his poison trail at all costs. It's best to refrain from engaging as Mega Gnar, as he can simply toss you away and create a toxic cloud around you.
Viego
HAHAHAHA, a king indeed? Don't let yourself get hit by his stun and poke him down until he doesn't want to be on the lane anymore. Once he reaches level 6, be a bit wary of his ultimate and don't underestimate the damage. Other than that, happy right-clicking.
Yasuo
Nothing you should be afraid of. Avoid getting hit by his Q and be aware that he can dash through minions. Once Hulk - uh, Mega Gnar is ready, engage. Try to keep him in one place and unleash your combo. He should quickly try to flee to a minion.
Yone
Like his brother... Avoid getting hit by Yone's Q or W abilities. If he uses his E ability and you're close to transforming into Mega Gnar, jump on him to land behind him and then kite Yone towards his own body. Either he'll be confused and unsure of what to do, or he'll dash right into his own body. In any case, as Mega Gnar, you can then finish him off.
Cho'Gath
Actually, it's a very, very, very straightforward matchup, but his kit can be a bit annoying for Gnar. Poke him as much as you can, but make sure you don't get hit by his Q. Because after the knock-up and subsequent slow, Cho'Gath will scream at you. Then he'll continue to slow you until you can finally jump away. Also, try to avoid getting hit by his silence. While you can still run away and even kite him, often a Q follows, leading to a CC chain. Pay attention to his spikes as well, and please, don't let yourself get eaten.
Garen
Garen is indeed another straightforward matchup. Try to keep two stacks on him, and when he tries to engage with his Q, activate your W with the third stack to gain movement speed. He won't be able to reach you. Otherwise, poke him as much as possible. You can also push the lane, as Garen is not a problem for a good Gnar. Just be cautious of ganks and place a control ward in the bush opposite the enemy buff to maintain vision control.
Jax
Jax is indeed not a problem for Gnar. Just keep in mind three things. First, avoid getting into melee range and stay within your autoattack range. Second, don't get stunned by him. If he jumps with his Leap Strike, immediately jump away. If he only jumps without stunning, wait for him to charge his stun and then jump away. And finally, don't let him kill you. If you notice that he deals more damage than expected, let him push the wave, poke him with your Q, and consider buying armor.
Poppy
If you don't play foolishly, Poppy can be an easy target. Definitely stay away from walls and don't let her poke you with her passive. If you do happen to get pinned against a wall, DO NOT jump away immediately. She will likely activate her W (Steadfast Presence), which will catch you twice in a row. If you pay attention to these two points, you should have an easy time. As Mega Gnar, make sure not to jump between her and a wall when engaging, and bait out her W beforehand.
Renekton
Look forward to your crocodile leather shoes. Poke Renekton with your autoattacks as often as possible. When he shows signs of engaging, throw your boomerang and proc your W. If he can recast his dash, jump away immediately. Don't let his combo hit you, and if it does, try to punish him for it. Don't underestimate his self-heal and damage.
Tryndamere
Another king, huh? Tryndamere is easy to handle. Make sure to keep Gnar's facing towards Tryndamere at all times. Even if Tryndamere dashes, as soon as you perform your movement action away from him, throw a Q towards him, which automatically reorients Gnar towards Tryndamere. At that moment, Tryndamere should have used his W. If not, wait and kite until he does. Don't engage in melee combat unless you're in Mega Gnar form. Then just unleash your attacks. When Tryndamere dashes towards you, use your boomerang and relish in his suffering.
Quinn
Just don't be foolish. Quinn is nothing more than a big minion. Avoid getting hit by her blind and keep your distance. Once the blind is gone, try to proc your W. Be cautious as she might push you back and trigger her passive, which can be painful. Once you can transform into Mega Gnar, try to bait out her knock-away ability and then unleash all your attacks. If you encounter difficulties, let her push and wait for assistance.
The guide is actively being edited, so don't be surprised by the absence of certain structures in the texts or missing images and references. However, I am still open to suggestions and ideas.
I am working on improving the readability.
Images will be added later.
Hey there, I'm Waqql, short for Waqqlpuddinq. Here are some statistics about my Gnar: League of Graphs
But here, I want to talk about Gnar because my statistics are bad, so let's get started.
One more thing, playing Gnar is incredibly fun. Who wouldn't want to play such a
fluffy, little monster?
Thanks to his Rage Gene, Hyper, and various items that he purchases, Gnar is quite nimble. Additionally, with Hop, he has a good engage/disengage ability.
Heavy CC as Mega Gnar
With his GNAR! and Wallop, Mega Gnar has a great ability to keep opponents pinned down for 3 seconds at level 18.
No Mana/Energy
Gnar doesn't use mana or energy and doesn't consume his health to cast abilities. So, happy poking.
Epic Engages
Using Hop / Crunch just before the transformation is perfect for engaging the enemy team, and with GNAR!, you can throw the enemies against the wall.
Ranged
Mini Gnar doesn't have to fight in melee range, which is beneficial for his health bar.
Rage Management
Through rage management, Gnar can control opponents or sneak up on them with a well-timed GNAR!.
%HP Damage
Gnar's Hyper deals percentage-based damage, which can be helpful for shredding tanks.
Difficult to Play
Gnar can be difficult to play if one struggles with managing the rage bar or has a problem with the various spells.
Hard to climb solo Q
Gnar is very team-oriented and not always able to run down the top lane.
Long Cooldowns
If Gnar fails to catch his boomerang or retrieve his boulder, he has to deal with a long cooldown.
Weak Early
Mini Gnar has low health and short range, which can make him an easy target.
Low Range
While Mini Gnar has an advantage against melee champions, his range is still relatively short. Even melee champions often have enhanced basic attacks that feel like they have more range than Gnar.
Rage Management
Gnar's rage can be a double-edged sword when you don't want to transform at the moment.
Punished for Misplays
Due to Gnar's long cooldowns and low health, he can be easily punished.
Playing Gnar is fun, and he is also a great choice for a team-oriented role with strong AoE crowd control and even stronger engages. Gnar is fast and mobile. With his Hyper and Hop is he difficult to catch and a torment for many opponents. Additionally, it's always amusing to toss surprised opponents against the wall with the right timing.
Gnar has low health and a short basic attack range, which makes him an easy target in many cases, especially when his Flash or Hop are on cooldown. Additionally, Gnar's movement can be predictable when he tries to catch his Boomerang. If Gnar misses his Boomerang Throw / Boulder Toss, he doesn't receive cooldown reduction on that ability. Additionally, it can be very frustrating when your team engages or gets engaged while you are still in Mini Gnar form.
Bone Plating is good against burst champions. But be careful with it, as it's easy to trigger
Triumph is simply the best choice among the three options.
Overgrowth provides permanent Health for dying minions? Who would say no to that?
Legend: Alacrity provides you with attack speed. What more could you want as Gnar?
10% Attack Speed
9 Adaptive Force
or
As Mega Gnar, you want to get in the middle of the enemies and slam everything against the wall that calls itself a champion. They will try to prevent that, so you will inevitably lose health. Last Stand rewards you with damage in return.
6 Armor
8 Magic Resist
Situational
Conqueror is probably more suitable for you than Fleet Footwork, when you know that you'll be in long lasting fights and cant survive it.
Grasp of the Undying grants great long term sustain and good for getting tanky for the late game.
Demolish is a great choice for getting free plates.
What can I say about Flash? Almost everyone has this spell in their arsenal. We love it and we need it, whether it's for survival or for securing kills.
Teleport is a must-have on the top lane. It allows you to quickly return to lane after a roam. It helps you recover better after an enemy gank. It enables you to support your team in various ways, and so on.
Not Recommended
Ignite is good against self heal opponents and allows for an aggressive playstyle.
Trinity Force provides Attack Damage, Movement Speed, a bit of Health, Attack Speed, and even Ability Haste. It's everything Gnar dreams of. Plus, it grants an Empowered Basic Attack. However, the Mythic Passive is not that great, unfortunately.
Good for staying alive and shredding tanks at the same time. However, Divine Sunderer only provides Attack Damage, Ability Haste, and a bit of Health, so I often prefer Trinity Force unless I'm up against a team full of tanks.
Choose one
Black Cleaver provides everything a Gnar needs except for Attack Speed. However, it offers the ability to reduce the enemy's armor by up to 30%. The better choice against tanks and AD fighters.
Good synergy with the Hyper ability. Wit's End provides movement speed and attack speed. The better choice against AP opponents than Black Cleaver.
You mostly buy both of them
If you need anti-healing, Thornmail is unfortunately your best choice to become tankier and get anti-healing. Since there are no MR anti-healing items available.
Force of Nature provides magic resist and movement speed. And of course, a bit of health as well. Additionally, there is a chance to gain additional 30 magic resist and 10% movement speed.
Final Item Pool
Death's Dance absorbs a part of taken damage and inflicts it to you as true damage over time. It also provides the ability to remove the remaining absorbed damage and heals you for 50% bonus AD over 2 seconds. Additionally, Death's Dance grants Ability Haste, Armor, and Attack Damage, making it a generally good item for Gnar.
Dead Man's Plate build up charges and grants you up to 40 movement speed at full charge. When fully stacked with 100 charges, the next basic attack deals bonus damage and slows the target.
Randuin's Omen is a good choice to significantly reduce AD damage with an item. It reduces incoming autoattacks by a percentage up to a certain value and also reduces critical strike damage against you.
Chempunk Chainsword is an offensive alternative to Thornmail, it provides ability haste as well. For Christmas, I wish for a magic resist antiheal item against Lillia.
Sterak's Gage is a very good choice to survive burst damage and potentially use your ultimate.
Keep in mind
Don't forget to upgrade your boots.
Personally, I recommend getting the boots upgrade as your first full item.
I will focus more on the abilities rather than possible uses or combinations here. Combos, tips, and tricks will be discussed below.
(Passive)
Rage Gene is your passive and your way to Mega Gnar. It is important to keep an eye on your Rage bar and learn when to do what. More on Rage Management below. Gnar generates Rage every time he takes or deals damage. When the Rage bar is full, the little rascal transforms into the menacing monster that everyone fears after 4 seconds or when you use an ability, such as Gnar's classic evolve while jumping engage. It is important to keep track of the Mega Gnar timer, as it only lasts for 15 seconds. Additionally, after transforming back into Mini Gnar, there is a 15-second lockout period for generating Rage. It's worth mentioning that Gnar slowly loses Rage if he goes 13 seconds without taking or dealing damage, and that dealing damage to champions grants more Rage. In addition, there are a lot of advantages and disadvantages between the two forms.
As Mini Gnar, you are very squishy, but you are rewarded with attack range, which even increases per level. Additionally, you gain movement speed and attack speed. Lastly, you have access to the three basic abilities: Boomerang Throw, Hyper, and Hop.
As Mega Gnar, in exchange for the advantages of Mini Gnar, you also lose your attack range. You gain armor, magic resistance, maximum health, and attack damage. Additionally, you have access to the three transformed basic abilities, as well as Gnar's ultimate ability. Boulder Toss, Wallop, Crunch, and GNAR!.
You literally transform into a bruiser tank.
Boomerang Throw has a pretty long range. On its way, the boomerang deals damage to each target hit, which is reduced after the first hit and slows them. After hitting a target, the boomerang quickly returns to Gnar. Catching the boomerang reduces its cooldown by 40%. So, always try to catch the boomerang, except for skillshot purposes (more on that below). Additionally, each hit of the boomerang applies a stack of Hyper to the enemy and each enemy can only be hit once.
(Q)
(Q)
Gnar's Boulder Toss throws a boulder that slows and damages the target enemy and those around them for 2 seconds. The house, which corresponds to the boulder in the Dino Gnar skin, can be collected again to reduce the cooldown by 70%. So, it's almost always worth retrieving the boulder.
Hyper is your main source of movement speed and also provides % magic damage. Hyper is triggered every third basic attack or ability on the same enemy, similar to Vayne's Silver Bolts, but you can apply it to multiple enemies at once. You aim to activate Hyper at least once in almost every trade.
(W)
(W)
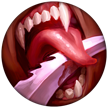
Wallop is a part of your crowd control chain. Mega Gnar smashes in an area in front of him. Enemies hit are stunned and take damage. Wallop offers many possibilities, from crowd control chain to escape options and even providing a protective stun for your ADC.
This is my favorite ability of Gnar. Hop allows you to leap a short distance forward and grants attack speed for 6 seconds. If Gnar lands on a unit, he will bounce off it and land a bit further back. Bouncing off a unit applies a stack of Hyper to that unit and deals % max health damage. It also applies a slight slow to the unit. Hop has many functions and possibilities, which I will explain further below.
(E)
(E)
Crunch is used for engaging if you missed the timing for the evolve engage. However, it should also be used for disengaging. It's better to jump out before Darius applies the final stack. Crunch deals % max Health damage to all enemies below and near Gnar upon landing. Additionally, all enemies directly below him are briefly slowed.
Only available as Mega Gnar
(Ultimate)
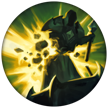
Lastly, but not least, GNAR! is a very powerful ability that allows you to stun all five enemies and follow up with a Wallop for a crowd control chain. Gnar's ultimate ability can only be used as Mega Gnar, which limits its usage and increases the difficult level with Gnar. Now, let's talk about the ability itself: Gnar pushes all enemies within range in a specific direction. After the knockback, affected enemies take damage and are slowed. If the affected enemies collide with a structure, such as a wall, a tower, Anivia's wall, Trundle's pillar, or even Azir's ultimate while he is on your team, they take additional damage and are stunned. Furthermore, GNAR! can be used immediately after Hop / Crunch, or even while in mid-air, allowing Gnar to surprise his opponents. With this powerful engage ability, Gnar becomes an essential part of the team.
Gnar's early game is honestly weak. Imagine being Mini Gnar like an ADC with less attack range, which shouldn't be a problem against melee matchups, one might think. However, as Mini Gnar, you also have the third lowest base health at level 18, with only 1883 HP (List base HP).
Short
So, summarizing the early game with Mini Gnar: The general focus is on minions, and if possible, trades should be made, especially when the opponent makes mistakes or with the help of your own combos, in order to take as little damage as possible.
I find it most comfortable to spend the early game farming. After all, you are a kind of ADC. Of course, if you are confident and certain, you can challenge the opponent and potentially get a kill, but personally, I advise against it before the first recall.
However, to avoid boredom before the first recall, trading is still possible. As Mini Gnar, you always try to proc your Hyper, but depending on the matchup, this may not always be possible. For example, against Irelia:
If you constantly try to proc your Hyper on her, you run the risk of positioning yourself unfavorably, to the point where only a jump to your tower can save you. To avoid that, it's better to throw your Boomerang at her from a safe distance and wait for the right moment to trade, such as when she executes a minion.
As Mega Gnar, the whole situation is different. You gain a lot of health, attack damage, and resistances with the transformation, which usually overwhelms your opponent.
Short
So, summarizing Mega Gnar: As mentioned, you should engage with the first transformation if the situation allows it. All subsequent transformations depend on the situation. Which matchup am I playing against? What is the current situation in the lane (behind or ahead)? Where is the enemy or allied jungler?
If you are ahead, as Mega Gnar, you should look for engages. If you are behind, as Mega Gnar, try to win a trade with Boulder Toss+ Crunch+ Wallop or rather play defensively and rely on Mini Gnar.
When you have traded very little and the wave is pushing towards you, you should be around the end of level 2 or even early level 3 with the first transformation. This usually means that you want to have some fun with your opponent as Mega Gnar.
In fact, I can only recommend engaging with the first transformation, depending on how confident you feel with Gnar. Through the first engage, you can get an idea of how the opponent reacts and adjust your playstyle accordingly. This means that if the opponent immediately retreats during an engage, you can easily maintain control of the lane.
With this knowledge, you can also keep the opponent at a distance when you are about to transform. For example, if you are 20 Rage away from the transformation but your gauge is already orange and Gnar is already visually changing, what the opponent doesn't know is that you can still land 2-4 more attacks before transforming. This way, you can already zone the opponent away from their minions and deny a lot of CS.
But what if the opponent doesn't respect Mega Gnar? Do not try to damage your opponent with basic attacks, as you will lose most trades due to minions and the opponent fighting back. Instead, throw your Boulder Toss at the opponent, jump after them, and hit them with your Wallop. Now you have retrieved your Boulder Toss, and thanks to Wallop, you have enough time to get back to a safe distance.
Keep in mind
Mini Gnar is nimble and has basic attack range, which allows him to put pressure on his opponent and constantly harass them. But be cautious, Mini Gnar has low health. Additionally, Mini Gnar has the ability to double jump, which makes it difficult to gank him.
Mega Gnar, on the other hand, is blessed with health and resistances, not to mention the bonus attack damage. However, he is very immobile, making it challenging to get out alive after an engage. So, enjoy the "Hulk" cautiously. Don't be afraid of ganks, place a good Wallop and Crunch to safety.
After the first recall:
Pink Wards!!!!! Always buy a pink ward. I don't care if it costs 75 gold, it will save your life at least once. Further down, there's more *information about Control Ward and where to place them.
After your first visit to the shop, the world already looks much better. Ideally, you have Hearthbound Axe and a pair of Boots. Refillable Potion are also recommended. Personally, I always buy them, no matter who or where I'm playing.
Now back to the lane, where not much has changed.
As Mini Gnar, you can play a bit more aggressively now, but keep a close eye on your opponent and the enemy jungler. Try to punish your opponent for mistakes and get them as low as possible with your relentless cuteness (). This sets up opportunities for your jungler to finish them off or you can do it yourself as Mega Gnar.
As Mega Gnar. You still want to engage with every transformation if the situation allows for it. Keep in mind that every failed engage might cost you the opportunity to help your jungler, whether it's because he is being invaded, the Scuttle is spawning, or a fight for the Herald is happening.
This brings me to an important point in the early game, slightly off-topic, so I'll give a spoiler warning to skip it.
Help your Jungler, Wave Controll, Deep Wards
Help your jungler. You can usually set up the lane in a way that you won't lose many, if any, minions in case your jungler needs immediate help with an invade. With the same preparation, you can also push the lane and assist with the Rift Herald or secure the Scuttle. Additionally, with the same preparation and a more aggressive playstyle, you can build up a huge wave and take down one or two plates (unfortunately, only up to two after the nerf).
The preparation is simple: freeze the lane near your tower, preferably at the point where the river begins. Seriously, lane control is important and simplifies many things. If you're still unsure about it, check out guides. I want to emphasize once again how important wards are. Don't be afraid of deep wards, as Mini Gnar, you have good escape options.
In the mid game, things can look better or worse, depending on how well you've performed so far. There are multiple paths to reach the mid game, and depending on which one you take, you should adapt your playstyle accordingly.
The way you play Gnar doesn't change much in the mid game. You continue to poke, trade, and look for opportunities to engage the enemy team and initiate team fights, opening up possibilities for objectives.
What now?
You should try to destroy the outer towers, starting from the top lane. If the enemy has already taken down your top tower, pay attention to where he'is heading next. If he stays in the lane, that's good news. You can freeze the wave where you want, as long as the enemy isn't pushing. If he is rotating, try to push your wave in and follow him.
If you manage to take down the T1 tower on top before your opponent does, try to further capitalize on your advantage by taking down other T1 towers when the situation allows. But don't give up your own T1 tower on top and make sure to assist your jungler in invades, ganks, or securing the Herald/Drake.
Keep in mind
Don't forget that Gnar is a team-oriented champion, which means you should assist your team as much as the situation allows.
From the playstyle perspective, not much has changed, so I'll spare you additional text blocks. Your priority now should be focusing on objectives, which will be further explained below.
If you have Teleport (recommended), try to push the opposite lane from the objectives. This will force the enemy top laner to come to you, and ideally, more members of the enemy team. Your team can take advantage of this situation to secure objectives.
However, keep in mind that death timers in the late game are much longer, which means you must absolutely avoid dying alone. Gnar is a team-oriented champion, so if you're not actively trying to apply pressure, you should support your team wherever possible.
As you may have noticed, Gnar is a team-oriented champion. So should you always stick close to your team? Well, there are some exceptions, such as Illaoi or Yorick, who prefer to stay in the top lane
(My Experience).
On the other hand, think carefully about whether it's worth defending the top tower instead of taking down a Fire Drake with your team. Try to find a balance between split pushing and team fighting, and lean towards the playstyle that you feel more comfortable with. Forced gameplays rarely go as planned.
Positioning in Teamfights
As Mini Gnar, you should keep in mind that you have traded your range for increased survivability. However, you can still take more damage than your carries, which means you should position yourself protectively in front of your carries. Of course, not as a suicide mission, but to deny the enemy an easy engage. Meanwhile, try to hit the enemy carries with your Q and increase your Rage by attacking anything within range.
As Mega Gnar, you have one of the best engage options. With the double jump from Hop and flash, you can reach even the backline carries. Your goal is to keep as many enemies as possible, preferably the carries, locked down in a stunlock. If that's not possible, try to give your carries enough space to unleash their potential. After your engage, focus on supporting your carries and assisting them if needed. If your carries are not in immediate danger, you can either pursue the enemy or join your team in taking an objective.
You want to win, right? Then your goals shouldn't be the opponents running around or the minions sent to their demise. Everything you do in the game should be focused on destroying the enemy Nexus.
Inhibitor
You want to apply pressure without being in the lane? Then you should destroy one of the three inhibitors. After destroying an enemy inhibitor, super minions will spawn on that lane. You should take advantage of this to force objectives or rotate to other lanes.
Tower
Before minute 14, the towers have a plate armor consisting of 5 plates, and each of these plates grants you a bit of gold. Therefore, it can be advantageous, especially with Gnar as lane bully, to chip away some plates. Every destroyed enemy tower provides you with opportunities, whether it's for roaming or creating more space for invades. There are three towers per lane, followed by one inhibitor and the nexus.
Lane Buffs
Baron
What can help you better in tearing down enemy towers than a minion army with Baron buff? Baron is important, but try not to die for Baron. If the enemies secure Baron and some champions on your team have fallen, you can probably say goodbye to at least one tower.
Herald
Ah, the good old hairy Herald (running gag). To tear down towers or to end the early game, Herald is the best option, so always try to secure it for your team. As a top laner, it wouldn't hurt to place a ward near the Herald as well.
Dragons
There are six different dragons, each with its own unique benefits. However, if possible, all dragons should be taken down by your team. The first dragon spawns at minute 5, and each subsequent dragon respawns 5 minutes after the death of the previous dragon. After the second dragon's death, the Summoner's Rift is enchanted with the corresponding elemental effect. Each slain dragon grants a "Dragon Slayer" buff to the team, up to four stacks. Each stack provides a unique advantage depending on the type of dragon slain. When the team reaches the maximum number of stacks, they obtain the Elemental Dragon Soul. After obtaining the Dragon Soul, the Elder Dragon spawns after 6 minutes.
Elder Dragon
Elder is the opportunity to ruin your opponents' mood. Make sure to utilize the buff as well. It doesn't make sense to solo push with Elder. Stay with your team and look for new objectives. With Elder, the opponents should not pose a problem, at least for a while. The buff inflicts true damage over time with your attacks. Additionally, it executes enemies below 20% max health.
Infernal Dragon
Who would have thought, the Infernal Dragon grants you 5% AP and AD per stack, making it the ideal dragon for dealing damage. The Infernal Soul, on the other hand, causes an explosion and ignites affected targets with the first attack on an enemy. Some just want to watch the world burn, like me. The Infernal Rift burns up bushes and walls, revealing larger areas.
Mountain Dragon
As expected, killing this dragon grants you 8% armor and magic resist per stack. Ever wanted a permanent shield that builds up outside of combat? Then the Mountain Soul is your soul. Walls are growing! The Mountain Rift creates new terrain, making it more challenging to traverse the Rift, but also providing multiple hiding spots.
Ocean Dragon
Killing this dragon gives you 2.5% health regeneration every 5 seconds per stack. And because that's not enough healing, the soul of this dragon allows you to heal yourself and restore mana with attacks on enemies. In the Summoner's Rift with the Ocean element, it starts to rain continuously, causing bushes to grow in new locations and existing bushes to expand. Additionally, Honeyfruits grow scattered throughout the Rift.
Cloud Dragon
Want 7% out of combat movement speed per stack, and even 15% movement speed + 60% when you activate your ultimate? Then you should secure this soul. A windy Rift. "Windfields" appear that increase your and the enemy's movement speed. Additionally, Scryer's Blooms spawn scattered throughout the Rift.
Hextech Dragon
This dragon provides you with 7.5 ability haste and 7.5 bonus attack speed per stack. The Hextech soul grants you the ability to trigger a lightning strike that can spread to up to 3 enemies when dealing damage to them. The lightning strike deals true damage and slows the affected targets. You mentioned that the Hextech portals from ARAM are missing. With the Hextech Rift, that's not a problem as multiple portals spawn.
Chemtech Dragon
The Chemtech Dragon grants you 6% tenacity and heal and shield power per stack. After obtaining the Chemtech Soul, when you are below 50% health, you gain 11% increased damage and 11% damage reduction. In the Chemtech Rift, the plants mutate, granting them additional functionalities. Additionally, 8 extra Honeyfruits spawn in the rift.
Vision
Rift Scuttler
My favorite, Even though it's listed down here, the Scuttler is extremely important for both junglers and laners. It provides a significant amount of experience and gold. Additionally, it leaves behind a "field" that grants movement speed to friendly units and provides vision of the area. If you play smart and take advantage of the vision it provides, you can prevent some ganks before they even happen.
Red Buff and Blue Buff
Red Brambleback and Blue Sentinel
These so-called buffs are important objectives for the jungler and later for the carries. Keep an eye on your jungler! Everyone has experienced it: your jungler gets invaded and completely shut down, all in the 2nd minute. So please, please, please pay attention to the minimap and help out when necessary.
Before delving deeper into the topic, it's important to note that Gnar's rage cannot be controlled: you can only accept it, make the best out of it and influence it, but you cant control it.
(reaching lvl 3 with close to 0 trades)
Trying to control Gnar's rage will inevitably lead to moments where Gnar evovles, resulting in a 15-second duration as Mega Gnar followed by a 15-second cooldown on his rage. Therefore, it's crucial to keep an eye on Gnar's rage bar and learn over time when to engage or disengage.
How to gain rage
Every time Gnar deals or takes damage, he gains 4 / 7 / 11 rage over two seconds. Additionally, Gnar generates rage instantly through basic attacks: 0.5 / 0.875 / 1.375 for non-champions and 2 / 3.5 / 5.5 for champions.
Last, but not least. When Gnar hits non-champions with Boomerang Throw, he generates 0.5 / 0.875 / 1.375 rage instantly. Similarly, when he hits champions with Boomerang Throw, he also generates 1 / 1.75 / 2.75 rage instantly.
Now, those are a lot of numbers that you don't have to memorize.
What's more important is to develop a sense for Rage gain, and that can only be achieved through practice, practice, and more practice.
Importance of rage management
In lane, it's important to synchronize your Rage with your level. Once you reach level three, you should have Mega Gnar prepared. To achieve that, it's best not to engage in too many trades early on because dealing or receiving damage increases your Rage.
Example Level 3
If you can't avoid trades, try to count down from ten. Just kidding, but on a serious note, try to refrain from dealing or taking damage until your rage bar reaches a comfortable level again. I cannot stress enough the importance of taking breaks from trading.
Overall, it depends on the situation. You should now know how to increase, maintain, or decrease your rage quickly. Try to find the right approach for yourself because no one plays Gnar exactly the same way.
Keep an eye on your opponents and teammates and try to react to possible situations. Prepare yourself for teamfights and don't feel pressured to engage just because you're in Mega Gnar form. Mini Gnar is also capable of dealing sufficient damage.
One of the simplest combos. The first Basic Attack grants you movement, thanks to runes and items. Boomerang Throw slows down the enemy, allowing you to follow up with another Basic Attack from a safe distance.
Good when at a medium distance from the enemy. If you are too far away, it becomes difficult to trigger Hyper. And it allows you to reduce the distance to the opponent.
It is effective for gaining or reducing distance. By triggering Hyper with Boomerang Throw, the enemy is slowed down while Gnar himself is accelerated.
Reverse
Since it's a boomerang, it usually comes back, making it useful for escaping. Simply throw the Boomerang in the direction you want to flee, and let the returning boomerang fly past you, hitting the enemy in the process.
This combo is great for gaining some distance and dealing damage to your opponent. However, keep in mind that you'll land behind your opponent with Hop, which can also be used to your advantage. If a Darius pulls you in, don't immediately jump away. Stay within his inner Q range and attack him with one basic attack, or if Boomerang Throw is on cooldown, two basic attacks. Meanwhile, position yourself behind him and use Hop to jump back towards your tower. However, keep an eye on the stacks on you, as if you take too long, Darius will bleed you out.
At maximum rage, any ability from Gnar can trigger the transformation.
That's your full combo. You aim to follow up each crowd control ability with a basic attack to increase overall damage. Whether with or without basic attacks, this is your all in combos.
This is your combo to initiate an engage. The slow from Boulder Toss makes it difficult for the enemy to escape and makes it easier for you to land Wallop.
This is your combo to initiate a retreat. The slow from Boulder Toss helps in creating distance. Crunch and Boulder Toss can be swapped.
(coming soon)
If an enemy gets too close, Crunch can be used offensively or defensively.
(coming soon)
I use this combo, for example, to force a Yorick under my tower, ideally after he has dealt damage to me.
If your opponent is a bit further away but you still want to engage, this combo is effective. The slow from Boulder Toss allows you to reach the enemy, but don't forget to pick up your Boulder again. This way, you can continue the combo directly with Boulder Toss.
Warding is crucial! So try to keep your trinket on cooldown. Control wards cost only 75g, and that's a good price to prevent a gank. Here are some more information about Warding
1. One of my favorite spots. An offensive spot. It surprises me how rarely it gets cleared.
2. Prepare to potentially lose your control ward there. However, it provides immediate vision of the midlaner if they attempt a roam. Alternatively, the bush below can be used.
3. In case your jungler frequently gets invaded or the midlaner wants to roam.
1. A defensive spot to prevent invades and monitor the buff.
2. Similar to the red team side, this spot is often cleared but provides good vision. Alternatively, the bush below can be used.
3. An offensive ward that is also frequently cleared. It offers good visibility, especially into the enemy jungle.
4. One of my favorite spots. While there is some risk in placing the ward there, it allows you to see if the red buff is ready and, of course, whether the jungler is taking it.
Mini Gnar is nimble and has basic attack range, which allows him to put pressure on his opponent and constantly harass them. But be cautious, Mini Gnar has low health. Additionally, Mini Gnar has the ability to double jump, which makes it difficult to gank him.
Mega Gnar, on the other hand, is blessed with health and resistances, not to mention the bonus attack damage. However, he is very immobile, making it challenging to get out alive after an engage. So, enjoy the "Hulk" cautiously. Don't be afraid of ganks, place a good Wallop and Crunch to safety.
Don't forget to upgrade your boots .
Personally, I recommend getting the boots upgrade as your first item.
For those who have stumbled down here, the beginning is up there. For everyone else, thank you for reading!
I will try to keep the guide up to date, but I'll likely need some help with that. I'm open to suggestions, improvements, and bug finders, so please assist me. If anything hasn't been answered or if you have any general questions, don't hesitate to reach out to me or leave a comment.
So once again, thank you for reading and have fun with the little monster!


 Build Guide By Waqql

 20,080
Views
20,080
Views
 3
Comments
3
Comments

 Thank You!


 Threats
 Synergies
 Show All


 Scuttle
 Help your Jungler, Wave Controll, Deep Wards
 Rift Herald
 Warding
 Twitch
You must be logged in to comment. Please login or register.