


This guide has not yet been updated for the current season. Please keep this in mind while reading. You can see the most recently updated guides on the browse guides page
 Split King: THE Rek'sai Guide
 Build Guide By Split King


 127,460
Views
127,460
Views
 4
Comments
127,460
Views
4
Comments
Rek'Sai Build Guide By Split King
4
Comments
127,460
Views
4
Comments
Rek'Sai Build Guide By Split King
 Thank You!
Your votes and comments encourage our guide authors to continue
creating helpful guides for the League of Legends community.


Recommended Items


Runes:


+10% Attack Speed
+9 Adaptive (5.4 AD or 9 AP)
+6 Armor
Spells:

Flash

Smite
Items
Ability Order

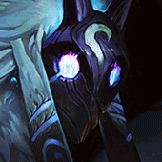
Fury of the Xer'Sai (PASSIVE)
Rek'Sai Passive Ability


Threats & Synergies
 Threats
 Synergies
 Show All
Extreme Threats
Show All
Extreme Threats
 Ideal Synergies


Graves
Graves can kite you and is fairly tanky even if you get to him. He will win most fights so don't force fights unless you are ahead.


Jax
Jax can jump to both ends of your Tunnel. If you gank his lane and use tunnel you boost both your own and his mobility. Jax also scales extremely well into the late game but is somewhat weak early, which is the exact opposite of Rek'sai's power curve. Rek'sai can control early while Jax can dominate late. This is a ideal Duo Q setup.


 Synergies
Jax
Jax can jump to both ends of your Tunnel. If you gank his lane and use tunnel you boost both your own and his mobility. Jax also scales extremely well into the late game but is somewhat weak early, which is the exact opposite of Rek'sai's power curve. Rek'sai can control early while Jax can dominate late. This is a ideal Duo Q setup.


Champion Build Guide
Hello there and welcome to my Rek'sai guide!
I am Split King a Grandmaster (at the making of this guide) in League of Legends. I got to Grandmaster on my Smurf account by playing exclusively Rek'sai (unless she was banned or I wasn't jungle) and it took me about 1 and a half months to go from Unranked to Grandmaster. I, therefore, think it's safe to say that I mastered this champion to a fairly high degree :)
I am known for about 3 things, Split Pushing, Late game dominance, and unusual playstyle. All 3 things remain true even when I play Rek'sai.
I also have a youtube channel that I spend a fair amount of time on
Please enjoy this highly in-depth Rek'sai video guide:
"Perfect" Rek'sai Game in Diamond at start of season 10:
The 1v9 is REAL here ;)
Diamond 2 Elo, extreme snowballing.
Sample Game 2:
Master Elo, Perfect counter plays. The opposing jungle is Grandmaster
Stream:
This one contains 3 Grandmaster Games as Rek'sai:
Let me walk you through the Rune choices!
Precision:
I feel like this Rune is overturned even after the Nerf which is why I always have this as my keystone rune. Rek'sai can actually scale fairly into the late game with this Rune.
This is also a certain rune pick.
All of these runes are decent. For the most part, I go with
If you go Crit'Sai then
Even when I am not going Crit'Sai I still pick
Choose wisely!
For most games
Like
Secondary Rune Path:
I have tried pretty much everything here and have found the runes that will get you the highest win-rate
Domination:
In Diamond Elo and above
In Platinum the 2 runes are about even.
In Gold and below always go
The best hunter rune on Rek'sai by FAR. The Extra movement speed allows you to move around the map faster which reduces the time you travel so you can use that time to be useful instead. Consider holding on to your Q
Game Start
Always start the game with
In either case make sure to have recalled so you are at your altar no later than 1:04 where you will change your
First Back
On your first back you should build towards your jungle item
I work on the
After getting
So on first back you should be spending your gold in this order:
If you are rich and can afford the entire
The only exception to the above buying order would be if you want to play Combo'Sai and have enough money to buy a
Second Item
After getting
If playing Combo'Sai
Get
See the Video Guide for some Spicy Combo'Sai stuff.
Fun fact, the cleave damage activates your R on all targets hit. So if you attack the frontliner and use the
If playing Standard'sai
Get
This is a good build to use if you are new to Rek'sai as it is always strong and you don't need to learn another button for your combo like
If playing Crit'sai
Get
This build is hard to pull off as you really need to know what you are doing (relative to your enemies). It is however extremely fun and can take your enemies by surprise. The reason this build can work is that the bonus damage from
If you take a lot of Damage after your
Third Item
If not Crit'Sai
Get
If Crit'Sai
Pick one
Combo'Sai Finish:
After your third Item, you should get
Should you become even richer you can sell boots and replace them with
Standard'Sai Finish
After you Third item you have a lot of options. You could choose to change your playstyle to Combo'Sai and simply buy
Or you could get
Or
Or
You can then finish your build with whatever item you didn't get as your fourth item. Again if you become rich and can buy item number 7, feel free to sell Boots and buy
Crit'Sai Finish
The only reason to play Crit'Sai is to deal unholy amounts of damage so...
MOAR DAMAGE!
Pick one of the items you didn't pick as your Third item.
Then finish the build with something like
If you can afford another item after this sell boots and buy
Situational Items
If my enemies have a naked base (no inhibitor turrets) I sometimes pick up this item to move safely through the jungle as I will know if they have vision of me at any point thanks to the Blackout passive. I can then safely take inhibitors by abusing Rek'Sais mobility.
The Blackout passive also has great synergy with the
Both the Video Guide and the Sample games have a lot of information on how to clear the jungle. But you can never get too much information!
I always clear my Red Side jungle first. This is because Red side clear gives you level 3 while the Blue side clear does not. Rek'sai is super weak pre level 3 and she also does not need the blue buff at all. Sometimes I even donate the first blue to my mid laner. The
Important:
When Clearing the jungle it is CRUCIAL that you know which monster to focus in a specific jungle camp.
Instead of telling you exactly who to focus (this changes on some patches) I will show you the math so you can find out at any given point what to do.
As a Rule of Thumb: Focus the monster with the highest DPS to Effective Health Ratio. A good example could be the Raptor camp. I see a lot of people focusing the Big
MATH TIME:
At level 1 the
700 HP
30 Armor
20 Attack Damage
0.667 Attack Speed
This means that it's effective health against physical damage is
700 * 1.30 = 910
Notice that One point of Armor means that the target can take ONE PERCENT more physical damage before it dies.
It's DPS is
20 * 0.667 = 13.34
Therefore it's DPS to Health Ratio is:
13.34 / 910 = 0.01466
The same math on the small
Stats:
400 HP
0 Armor
13.33 Attack Damage
1.000 Attack Speed
Effective Health:
400 * 1 = 400
DPS:
13.33 * 1 = 13.33
DPS to Health Ratio:
13.33 / 400 = 0.03333
Which is more than TWICE as much as the Big
This is because both Raptors have the exact same DPS but the Big Raptor has far more effective Health. The math changes slightly if you use True Damage, but at level 2, Rek'sai deals exclusively physical. (Also the Big
TLDR: The Big
Also:
Focus the small wolves first.
Focus The Big Krug first (you should smite it).
When doing your second clear you probably have
If you want to know what to do after clearing your Red Side I suggest that you watch the video guide or the sample games. Good luck!
I Split push with Rek'sai if:
- Baron has been slain or has not spawned yet
- I am Fed
- We have a weak 5v5 Comp.
Fun fact: I used to talk about Rek'sai split pushing on stream, saying that the only thing she really needed to shine would be for her q to work on turrets. As of patch 9.19 that is now a reality :)
You can have a look at some of that madness here:
Links:
Youtube Channel
Twitch Channel
Patreon Page
Shen: A tanky split pusher with a supportive Kit. This guide can teach you a lot about split pushing and map awareness even if you don't want to play Shen.
Viable Elo: Mid to High.
Shen is a weird champion since he actually gets stronger the higher rank you are. Throwing a well-timed Shen R on a Diamond ADC does a lot more than throwing it on a Silver ADC. I do not recommend playing Shen Below Gold.
Link: World Famous Shyvana
Shyvana: A tanky Split pusher with very high sustained damage. I am disgustingly good at this champion. learning to play Shyvana does not take long. You can become fairly adept at Shyvana even with limited time on your hands if you follow this guide.
Viable Elo: Any
Shyvana is a very stable Champion. She is viable in almost all patches and all ranks
Link: Control Mage Teemo
Satan: A squishy Satanic Hamster that can control the battlefield with his shrooms. The map control is amazing. You can use it for vision resulting in a safe split push, or you can use it to place a heavy line of defense that makes it very hard for the enemy team to finish. A full build Teemo is also very scary. If you have sold your soul to the devil this guide is for you.
Viable Elo: Low to Semi-High
I can only play Teemo effectively up to about Diamond 3. Most players above that Rank knows too well how to abuse his weakness. I will however highly recommend using Teemo for climbing if you are below Diamond. You can climb fast and reliably with Teemo because he does not rely much on his team. Be a one-man army.
Link: THE Rek'sai Guide
Rek'sai: A void monster that burrows underground to stalk her prey. I got to Grandmaster with this champion and it's possible that I am even better on Rek'sai than on Shyvana. Rek'sai is extremely fun to play once you master her but it does take some time since she essentially has 7 abilities instead of the standard 4. You should use this guide if your main concern is to get as high rank as possible.
Viable Elo: Mid to VERY High.
You could still use Rek'sai in low elo with great success if you become good at her, but since she is harder than most champions to learn I would advise against this. When I play ranked on a new account I rarely start out by playing Rek'sai as there are other champions that can carry better with enough kills. You can, however, reach any elo with enough skill because Rek'sai is so extremely strong right now.
LINK: Rammus Guide
Rammus: A Tanky Tank. Rammus gives zero ****s because he cannot die. This guide is ideal for newer or low elo players since Rammus is extremely easy to play. You can learn the basics of the jungle without having to worry about learning a difficult champion at the same time.
Viable Elo: ANY (If picked as a counter) or LOW-MID (If picked every game)
I played Rammus alongside Rek'sai and Shyvana when I got to Grandmaster the first time. BUT I only pick Rammus against certain setups otherwise he is just too weak. The guide contains a section about WHEN to pick Rammus. Rammus is designed as a Counter Champion to AD.


 Facebook
 Twitch
You must be logged in to comment. Please login or register.