


 [25.S1.2] [NA] Beefy's Challenger Bard Guide


 122,195
Views
122,195
Views
 4
Comments
122,195
Views
4
Comments
4
Comments
122,195
Views
4
Comments
 Thank You!
Your votes and comments encourage our guide authors to continue
creating helpful guides for the League of Legends community.
Recommended Items


Runes: Guardian


+10% Attack Speed
+10-180 Bonus Health
+10-180 Bonus Health
Spells:


Flash

Ignite

Items
Ability Order Abilities

Traveler's Call (PASSIVE)
Bard Passive Ability


Threats & Synergies
 Threats
 Synergies
 Show All
Extreme Threats
Show All
Extreme Threats
 Ideal Synergies


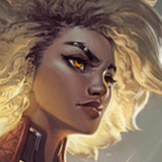
Karma
Karma is an extremely tough matchup for Bard. She bullies you in lane with her mantra Q and scales just as hard in teamfights with her mantra E. Her E also makes it very difficult for you to land abilities on anyone on the enemy team. BAN WORTHY


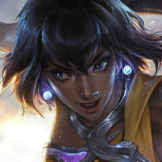
Aphelios
As long as your ADC can play him properly, Aphelios is extremely good with Bard. He has range with green gun, can sustain when you're not there with red gun, self peel with purple, and waveclear with blue. This champion has everything.


 Synergies
Aphelios
As long as your ADC can play him properly, Aphelios is extremely good with Bard. He has range with green gun, can sustain when you're not there with red gun, self peel with purple, and waveclear with blue. This champion has everything.


Champion Build Guide
If this guide helped you at all please consider giving it an upvote, it really helps me out. You can also catch my streams at https://www.twitch.tv/beefyy and ask me any questions or tell me if I missed something in this guide. You can also flame me whenever I miss my skillshots. Thanks!
PASSIVE - Traveler's Call
Chimes will spawn periodically around the map for you to collect. They give a small amount of experience and mana, so make sure to use some mana in lane before you pick one up. This is the main reason that Bard's roaming is so strong. The experience you miss from lane minions is made up by the experience gained from chimes.
One mistake I see many Bard players make is roaming JUST to get chimes. You should be picking up chimes on the way to go do something else (roam mid, go to herald, etc.). Most of the time giving up pressure and making your ADC 1v2 just to get chimes is not worth it.
The second aspect of Bard's passive are his meeps. Meeps will follow you around and empower your auto attacks. As you collect more chimes your meeps will become stronger, gaining damage, a slow, and an AOE cone behind your inital target.
Meeps are what give Bard his ability to trade in lane. You want to make sure you have at least 1 meep before you go in for any trade because without meeps your auto attacks are pretty much useless.
Important Chime Powerspikes
5 chimes: Meeps will slow on impact
15 chimes: Meeps will gain a damaging and slowing cone behind your initial target
35 chimes: Meep cone significantly increases in size
Q - Cosmic Binding
Bard's Q is a line skillshot that does damage and slows enemies. It will also travel through the first target, hitting a maximum of 2 targets. If you hit multiple enemies or one enemy and then a wall, your Q will stun its targets instead.
This skillshot takes a lot of practice, but once you master it can become an extremely impactful ability in any fight if you can stun multiple targets. I would recommend going into the practice tool just to get used to this ability's range and projectile speed.
Something to keep in mind when using this ability is that it will always travel a fixed distance after the first target. This means that if you hit a champion at the very edge of the ability's indicator, it will travel beyond that threshold after and can hit another target. This is extremely useful when ganking a lane and you can easily surprise your enemies with how far this ability can travel.
W - Caretaker's Shrine
Bard places a health pack on the ground that grows in strength over time, reaching its maximum potency after 5 seconds. Allies can step on this shrine to gain health and a burst of movement speed. Enemies can also step on the shrine, destroying it. You can have a maximum of 3 shrines at a time, and stores up to a max of 2 charges.
Place these shrines bot lane for your ADC before you go to roam. While they don't heal for much, that small amount of health and movement speed can be the difference in them living or dying. They do cost quite a bit of mana, however, so be smart early to make sure you aren't wasting mana on shrines that you don't need.
Keep in mind that this ability can also be used directly on an ally for a quick heal and movespeed buff. This is still possible if you have 3 shrines on the ground already; using another one directly on an ally will not get rid of any of the 3 on the ground.
E - Magical Journey
Bard creates a tunnel on any wall that both allies and enemies can take to travel through the wall. Allies travel faster through the portal than enemies do.
Use this ability to peel for your allies, escape when you're caught, and chase after low health enemies. If you time it right this ability can also be used to pull champions such as
This ability synergizes extremely well with your Q,
If you ever are caught, you should always look for the longest portal possible to escape. Because you will travel faster than enemies do, the longer the portal is the more space is will create between you and the enemy if you both take it.
Ultimate - Tempered Fate
A long range skill shot that will place everything in its zone into a statis, making them unable to move, attack, or take damage for 2.5 seconds. This is one of the most versatile abilities in the game and has a plethora of different uses.
You can use it to catch enemies out, forcing them to burn their flash, give an ally a free
My best advice for this ability is to practice (a LOT), and to not be afraid to use it. You will throw amazing ults that win a teamfight, you will throw terrible ults that lose a teamfight. I have played Bard for years now and I still throw bad ults all the time. Don't be timid; learn what you can and cannot do with this ability and don't be hesitant to pull the trigger.
Guardian
This rune page is the most consistent and the one I recommend you use if you are trying really hard to climb.
As Bard is able to apply near infinite slows with his Q and meep autos, Font of Life is the best choice for the second row. While it doesn't heal nearly as much as it used to, it has a fairly short cooldown so make sure you're using it often.
Similar to Unflinching, Overgrowth provides a ton of value once you pass the 120 minion threshold. While you don't absorb CS as quickly as you would as another laner, it's still the best 3rd row rune after Unflinching was reworked.
With the recent change to boots, rushing tier 3 boots is no longer viable. Magical footwear now lets you save 300 gold in addition to providing 10 bonus movespeed over normal boots. Additionally, as you will be roaming around the map you should be picking up a good amount of KP, reducing the time to receive your boots.
Bard's laning phase is quite weak in most matchups, so taking biscuits can help you make it through the early game, especially into enchanter/mage matchups. They also provide an additional 90 max hp once all 3 are consumed/sold. Remember to wait until you are as low as possible before using them, as the flat heal is very low but restores a large amount of your missing HP. If I am ever in base and have unused biscuits, I will usually sell them for the 5 gold and instant max HP.
For the minor runes, take attack speed and double scaling HP.
Boots
As we'll be taking
This also extends to tier 3 boots if you have completed Feats of Strength. I don't make it a priority to upgrade to tier 3 boots as the stats/passive they give are not great for the gold you have to spend, but if I base with just enough money to purchase them but not something else, I once again opt for the immediate combat power. If you follow this guide, you'll be building multiple items that give movespeed to partially make up for sitting on tier 1 boots for longer than we have been in the past.
Support Item
Once the support quest is completed, I will always opt for
Legendary Items
Most games, I'll start with
After Dead Man's, your build becomes extremely flexible and should be molded to your current game - take into account both your team's comp as well as the enemy's comp and build around that. In a standard game where both team's comps are balanced between AD and AP as well as damage and tankiness, I will usually follow up with a magic resist item.
To round out the build, I finish with
This build is extremely consistent as you will have 1 armor item, 1 MR item, and a ton of HP, as every item you buy has HP with all of the additional HP taken in your runes. This build also provides a significant amount of damage once you reach full build, with both Liandry's and Bloodletter's being applied by your large cone meep auto attacks in the mid to late game.
Additionally, if you are able to reach this 4 item spike on Bard, you should be able to 1v1 enemy carries with relative ease due to Bard's extremely high base damage and tankines. Both mages and ADCs currently struggle to kill most tanks, and Bard is no exception so if you do end up reaching this point make sure you are playing teamfights aggresively as enemies typically do not expect the damage that this build can do.
If your team is not lacking damage and instead needs a frontliner, building more traditional tank items is very good as well. Versus heavy AD comps, some options after Dead Man's include
Thornmail is a good option if you need grevious wounds, Randuin's is strong versus multiple crit based carries, and Frozen Heart is the most flexible and is effective versus most champions in the game.
Versus heavy AP comps, I will usually still start with Dead Man's. Afterwards, you can build multiple of the above options for MR (
Some other miscellaneous tank items that can be slotted in are
Control Wards
If you watch my games, you'll notice that I purchase far fewer
As a reminder, if you collect your first 3 chimes before laning starts, you will hit level 2 1 minion early and can use this level advantage to press up and harass the enemy.
A good rule of thumb for trading is to only walk up when you have a meep and at least 2
Versus most engage supports, you will have to avoid their counter engage. Most of the time this entails dodging an important skillshot like
Remember to place down
It is important to get bush control as a ranged support. Your first goal as soon as the minions reach bot lane should be to walk into the farthest uncontested lane bush possible to enemy tower that you can (this usually ends up being the middle brush, but if you are able to get into the furthest one, even better). Now, the enemy support/ADC will either ward the bush you are in or give you bush control uncontested. If they ward, you will most likely need to retreat as there are very few 2v2 matchups in the game that Bard doesn't lose. However, this is still a positive outcome as the enemy having to use a ward in a lane brush means one less ward they can place in the river to protect against jungle ganks. Early game wards from trinkets are the most important and scarce in the game due to supports not having their first support quest completed, so if you are able to get wards out from 1 or both of the enemy laners early, this could lead to successful ganks in the future.
If they do not ward the bush you are in, you now have a massive pressure advantage in the lane. If the enemy cannot see you, you will always get the first hit in while trading and they will have less time to react to your Q, making it much easier to line them up for the stun. You are also able to quickly drop the enemy minion's aggro by walking back into the bush, as enemy minions will always turn their focus to you if you auto attack enemy champions near them. Never underestimate the minion's influence in trades/all ins - the number of minions near a fight can easily sway the fight one way or the other, especially prior to backing for the first time purchasing some items.
As laning continues, the amount of bush control you will be able to keep is largely dependant on the matchup. You should try and stand your ground and maintain bush control as much as possible, but you should never risk dying or take an extremely bad trade to keep it. Some champions like
Finally, you can use your
Let's start with the most basic mistake I see most Bards (and support players in general) making: walking from fountain to bot lane. I know that minion wave experience looks tempting and your ADC might spam ping you, but you need to get into the habit of walking to bot river nearly every time you leave base. Getting vision in river is the most important job for the support in the early game. Having vision control in river means that your laners will see every gank attempt, your junglers can take crabs, and you can have the fastest route to and from the different lanes.
As soon as you complete your first support quest and get
Roam timings are dependant on two things: wave management and matchups. A wave in a good spot means you can roam without consequence, a wave in a bad spot means if you roam your ADC will die and you will get flamed. If the wave is slow pushing or is frozen on the enemy's side of the lane, then you cannot leave. You have to push the wave into tower so it will reset or if you need to call your jungler down to help break the freeze. If you roam on a frozen wave your ADC will get permanently zoned from gold and experience, or, in some cases, they will greed for the wave and die 1v2. But, if the wave is frozen on your side or is pushing towards you, you have a window to roam while your ADC can sit back and wait for the wave to come to them.
In these scenarios, the other thing that effects roam timings comes into play, matchups. There are certain matchups where you cannot leave your ADC to 1v2 even under their own tower as they will get zoned off the wave or just straight up dove. An example of this would be if your ADC is playing
This is not always the case, though. Say your ADC is
Another important skill to know is when to roam top. Roaming top is a significantly bigger investment of time than roaming mid and it is much harder to kill top laners as they usually have more tools to escape ganks than the immoble mages you'll find mid. But, if your jungler is there the walls are really good for tunnels on both sides of the map for a 3 man gank. It’s also a pretty common play to help your jungler on herald and immediately go top for a 3 man dive. While you won’t be providing much damage, the angle is good for a stun against the wall. You can also hit them first and stand at the edge of tower range, tanking as many shots as is needed.
Keep in mind that sometimes roaming top and letting your ADC get 3 man dove is worth it, as long as you are getting more on the other side of the map with herald (just hope your ADC doesn’t tilt).
With all that being said, it is important that you identify the win cons in your team comp and play towards that. Just because you can roam as Bard, doesn't mean you always should. There are some games where the best play is to stay bot and play more of an enchanter role because your ADC is the one most likely to carry. You should be thinking about these things even before the game starts, in champ select and the loading screen. Play towards your team's strengths and negate any weaknesses, and you will carry with Bard in the support role.
Now that you know when and where to roam and you've completed your first support quest and swapped to
Warding is pretty unique for Bard, as his
The simplest way to think about warding is to imagine a line connecting all of the outermost enemy turrets that are still standing and obtain vision control around this line. Turrets are the primary spots of safety for every player in the game, so this imaginary line between turrets will often be the areas of the map that see the most player movement and where your wards will be most effective.
In the early game, this basically means the river. Like I said above in the roaming section, having vision control in the river in the early game means that you have the most opportunitues for picks and objectives and minimize the risk of dying to ganks/roams. The below map shows the best spots to place your wards in the early to mid game before any towers have fallen (blue circles for blue side, red circles for red side, purple for both):
Keep in mind that these placements can change based on the state of your game. If you need to place some more defensive wards on your own side of the river to scout for invades or dives, that is perfectly fine to do as well.
As turrets begin to fall during the midgame, you'll want to adjust your ward placements to compensate. Losing your own turrets means you'll have to back your vision line up, while taking enemy turrets means you can push deeper into the enemy jungle. During the mid game, if you are winning, the most effective wards will usually be on the enemy's jungle camps. If your team is stronger, you can push into the enemy jungle and threaten them off their own camps, thus cutting off a significant portion of the enemy jungle's source of gold and experience. The reverse is also true, if you are losing you'll want to ward your own camps to preserve as much safe income as possible to mount a possible comeback.
You need to keep objectives in mind as the game progresses - using all 3 of your wards in the enemy's topside jungle as dragon is spawning means you'll be at a severe disadvantage for that fight. Additionally, when an objective is spawning and you know there will be a teamfight, it's a good habit to place 3 wards in the area 45 seconds - 1 minute before the objective spawns, reset, and come back with another fully refilled set of wards. This means that even if the enemy support/jungle sweeps your first set of wards, you have the ability to replace them immediately. If you do this and the enemy support does not, you've essentially doubled the amount of vision you are able to place down over the enemy support which can be a key factor in how the fight plays out (especially on Bard, who is very good at getting picks).
As the game transitions to the late game, your ward placements become extremely variable based on the state of the game. If you have taken all inner and outer turrets, a common ward spot I like is directly over the enemy base's wall gates (you'll have to place it pretty much directly in the middle of the 2 inhib towers, otherwise the towers will see it). If unswept, these wards can track almost all movement in the enemy base. What was said above about warding objectives is extra important due to the significance a late game objective like Baron or Elder Dragon can have on the game.
Finally, all the information above applies to the enemy support as well, so the most effective spots for their wards will be the most effective spots for your sweeper. In addition to thinking about where you want to place your own wards, you should be thinking about where the enemy support wants to place their wards and use your sweeper accordingly.
P.S. If you're playing against a
Alternatively, if you have a fed backliner on your team that you want to protect, you can use your ultimate to give them a free
When it comes to your other abilities, you want to use your
Finally, the last thing I want to emphasize is to use your health bar as a resource. With the recommended build, you will be extremely tanky and you should be putting that to good use. It doesnt matter if you have 200 armor if you are sitting behind your carries, waiting for them to get hit first. You should be an annoying pest in the enemies face, distracting them so that your carries can free hit while you tank the enemies' abilities.
I love Bard; he is by far my favorite champion and I hope this guide helps anyone who reads it to have fun playing Bard as well. If you did enjoy it, an upvote here is greatly appreciated as it helps me spread the Bard love even more.
Finally, if you have any questions you want to ask I am more than happy to answer. I stream most days on Twitch, but if I'm not live you can shoot me a whisper on Twitch or a message on Discord and I will try to get back to you ASAP.
Thanks for reading and good luck in your chime collecting adventures!


 YouTube
 Twitch
You must be logged in to comment. Please login or register.