


Not Updated For Current Season
This guide has not yet been updated for the current season. Please keep this in mind while reading. You can see the most recently updated guides on the browse guides page
x
Bot Lane Combinations - Support and AD synergy
 Build Guide By JAYZORZ
71
12
Build Guide By JAYZORZ
71
12
 824,326
Views
824,326
Views
 62
Comments
62
Comments
71
12
824,326
Views
62
Comments
Build Guide By JAYZORZ
824,326
Views
62
Comments
Build Guide By JAYZORZ
x
Did this guide help you? If so please give them a vote or leave a comment.
You can even win prizes by doing so!
Vote
Comment
I liked this Guide

I didn't like this Guide
 Thank You!
Your votes and comments encourage our guide authors to continue
creating helpful guides for the League of Legends community.
Choose Champion Build:


Recommended Items


Spells:

Flash

Ignite
Items
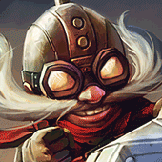
Graves (Def)
![]()

Ability Order

New Destiny (PASSIVE)
Graves Passive Ability


Introduction
BOT LANE SYNERGY
Hey guys and welcome to my 6th guide. This is a completely different kind of guide for me, I have only written specific champion guides before this, but this guide is about the synergy of some AD carrys with some supports.
Up the top I have only included 5 of each as this is all that is possible. Others that I wasn't able to include are
Carry:
Support:
The fact that I didn't mention them in the teams doesn't mean they are bad, and I will discuss some of their synergies further down, but above I have included some of the best situational combinations inside the team section at the top.

About This Guide
Bot lane typically features an AD Ranged Carry of whom farms and/or kills to enable strong late game damage and a support, who aids this. These champions should synergise well together for maximum effectiveness, and as such I will write about champion synergies that I have found in my ~800 ranked games and my ~1200 normal games.
This guide features what I deem to be the best synergy between a carry and a support for one reason or another, explained more below.
Layout Example (ADC + Support)
Explanation: This is where I explain what makes the combination good.
A picture of the AD carry will be to the left
and the support will be to the right.
Here, I include my rating for the particular combo regarding the:
damage factor
the safety factor
and the difficulty factor.
Build Note: I will explain any 'unusual' choices regarding runes/masteries/summoner spells/skill sequences.
Soon to come
Soon to come includes:
- mentioning of atleast every champ listed above atleast once
- counter section/how to play against
Furthermore, these builds aren't fully up to date, with
Lane Type
The main types of lanes are
Kill Lanes: Lanes that aim to catch or quickly burst down an opponent and aim just as much for kills as for farm for late game; Intent on shutting down opponents whilst becoming strong via kills.
Poke Lanes: Lanes with good range/harassing abilities that are aimed at slowly wearing down the opposition to make them go back and miss exp/gold or to eventually kill them; Intent as much on keeping opponents underleveled and having you stronger via farm and xp advantages.
Farm Lanes: Lanes intent on just farming and shrugging off/sustaining through damage dealt in hopes to outscale the opponents into the late game; Intent on 'surviving' lane phase and hoping to outscale the opponent so as to be stronger via certain abilities.
In general, but not all cases,
Kill Lanes > Farm Lanes = Kill them before they can farm
Poke Lanes > Kill Lanes = Poke down before engages so when they attempt to kill can be turned
Farm Lanes > Poke Lanes = Sustain through the poke and farm to outscale late game
However, some lanes will fall into multiple categories.
Balanced (Graves + Taric)
|
. . . . . . . . . . . |
Explanation: This is a very balanced lane combination as they have good defense, sustain and damage. Due to this, it is a quite safe lane, but that said you still do have some kill potential. The difficulty isn't too high as if you make a mistake, you should be strong and tanky enough to redeem it quite frequently. |
. . . . . . . . . . . . |
Damage: 7/10
Safety: 6/10
Difficulty: 4/10
Combo Kill Lane (Vayne + Blizcrank)
|
. . . . . . . . . . . |
Explanation: This is a very aggressive lane combination as both However, they have amazing damage right from the start. If Due to this, the lane is fairly safe. You don't have sustain or any defensive buffs but you do have nice escape mechanisms. However, this lane may be hard as you might get poked and forced out of lane. It is also very reliant of skillshots hitting. |
. . . . . . . . . . . . |
Damage: 10/10
Safety: 5/10
Difficulty: 7/10
Build Note: I take
Passive Farmers (Ashe + Soraka)
|
. . . . . . . . . |
Explanation: This is a very passive lane combination as They have very little damage compared to other combinations and aren't likely to even try to fight as they are stronger late game than early game. Neither has a reliable escape except Starting |
. . . . . . . . . . . |
Damage: 3/10
Safety: 7/10
Difficulty: 6/10
Quick Kill Lane (Corki + Leona)
|
. . . . . . . . . . . . . . . . . . . . |
Explanation: This is a very aggressive lane combination as well, as both However, they synergise very well, and after around lv 3, when they both have all their abilities, they are very strong. Due to this, the lane is fairly safe for It is a fairly hard lane because you need to work together and engage at the same time for the |
. . . . . . . . . . . . . . . . . . . . . |
Damage: 9/10
Safety: 5/10
Difficulty: 7/10
Build Note: I take
Counter Carry Poke Lane (Ezreal + Nunu)
|
. . . . . . . . . . . . . . . |
Explanation: This is a very safe lane combination. However, they are actually able to win straight out fights due to their utility. You also have a lot of escapes, the aforementioned Due to this, the lane is very safe. The lane isn't that hard either, as |
. . . . . . . . . . . . . . . . |
Damage: 6/10
Safety: 10/10
Difficulty: 5/10
Build Note: I take
Build Note: I take
The recent patch has made
The 5 Combinations
Shutdown Lane (Caitlyn + Sona)
|
. . |
Explanation: Very strong early. Has good sustain but even better poke. However, they also have very nice escape mechanisms thanks to Due to this, the lane is fairly safe. You have as well as some nice escape mechanisms. |
. . . . |
Damage: 5/10
Safety: 8/10
Difficulty: 4/10
Poke to Death (Varus + Nidalee)
|
. . . . . . . . . . |
Explanation: This is a poke heavy lane. If Due to this, the lane is fairly safe. You have a heal, long range and also have nice escape mechanisms. It isn't a difficult combination, but does rely on |
. . . . . . . . . . . |
Damage: 6/10
Safety: 4/10
Difficulty: 6/10
First Blood Approaches (Draven + Alistar)
|
. . . . . |
Explanation: This is a damage heavy lane. They also have good escapes thanks to Due to this, the lane is fairly safe, and on top of this you have an AoE sustain thanks to |
. . . . . . |
Damage: 9/10
Safety: 5/10
Difficulty: 6/10
Uber Lock-on Poke (Urgot + Janna)
|
. . . . . . . . . . . . . |
Explanation: This is a heavy poke lane. A funny wombo combo is very hard to pull off, but Escapewise, they are decent. Due to this, the lane is fairly safe and also offers a lot of long ranged poke, meaning it fairs great vsing a non-sustaining lane. |
. . . . . . . . . . . . . . |
Damage: 7/10
Safety: 6/10
Difficulty: 5/10
Yordle Power (Tristana + Lulu)
|
. . . . . . . . . . . |
Explanation: This is another heavy poke lane, but with higher burst and less range. Escapewise, As such, you aren't likely to die and with your strong poke and burst, you can often obtain kills or force the opponents out of lane, especially against a non-sustain support. |
. . . . . . . . . . . . |
Damage: 7/10
Safety: 6/10
Difficulty: 3/10
Unfair Fighters (Corki + Taric)
|
. . . . . . . . . . . . . . . . |
Explanation: This lane is quite underused, atleast from my personal experience. But this is not their main strength, it comes from the ability to make their opponents unable to trade well at all. This lane also really isn't too difficult at all. You just require to utilise your buffs/debuffs during trades and it will become increasingly harder for your opponents to trade, especially if they lack the sustain of |
. . . . . . . . . . . . . . . . . |
Damage: 7/10
Safety: 7/10
Difficulty: 5/10
Ahh, Monsters (Kog'maw + Nunu)
|
. . . . . . . . . . . |
Explanation: This is a very vicious lane, and well played, very hard to even touch. This lane isn't too safe though. Despite the range of This makes the lane difficult, but both of these champions scale extremely well to late game so it becomes even stronger. If played well, this lane is almost impossible to touch, but does require constant warding and large amounts of map awareness. If played badly however, can easily result in a fed enemy carry. |
. . . . . . . . . . . . |
Damage: 8/10
Safety: 3/10
Difficulty: 10/10
Bloodlust (Tristana + Taric)
|
. . . . . . . . . . . |
Explanation: Great for getting early kills. As soon as she gets her The weakness of this lane is it's difficulty. A poorly-executed combo will, at the very least, cost Safety of this lane is very strong, with |
. . . . . . . . . . . . |
Damage: 8/10
Safety: 6/10
Difficulty: 7/10
Unstoppable (Graves + Soraka)
|
. . . . . . . . |
Explanation: This is widely considered by the community to be THE farming lane, and it's easy to see why. Though, this been said, he also has two great escape abilities in the form of This lane also really isn't very difficult at all. Your laners just have to last hit, heal if needed, spam |
. . . . . . . . . |
Damage: 6/10
Safety: 8/10
Difficulty: 2/10
Da Splitpush too stronk (Caitlyn + Zyra)
|
. . . . . . . . |
Explanation: Due to this, they can continue to push lane with thorn spitters and This lane also really isn't very difficult at all. You just need to poke them and farm whilst using your warding abilities, coupled with wards, to remain safe from enemy ganks. |
. . . . . . . . . |
Damage: 6/10
Safety: 8/10
Difficulty: 2/10
Summary
Also, offer your reasoning for a new combination that I haven't listed and I will attribute the chapter to you, stating it is your work and giving you the credits.
Also leave any feedback and I will do my best to adapt this guide and have it as a useful resource for anyone looking for an effective combination.
Cheers guys
-Jayzorz

JAYZORZ
Guide
Bot Lane Combinations - Support and AD synergy
You must be logged in to comment. Please login or register.