This build has been archived by the author. They are no longer supporting nor updating this build and it may have become outdated. As such, voting and commenting have been disabled and it no longer appears in regular search results.
We recommend you take a look at this author's other builds.
This guide has not yet been updated for the current season. Please keep this in mind while reading. You can see the most recently updated guides on the browse guides page
 Thank You!
Your votes and comments encourage our guide authors to continue
creating helpful guides for the League of Legends community.
Recommended Items
Runes:


+8 Ability Haste
+6 Armor
+10% Tenacity/Slow Resist
Spells:

Flash

Ignite
Items
Ability Order

Concussive Blows (PASSIVE)
Braum Passive Ability
Threats & Synergies
 Threats
 Synergies
 Show All
 Extreme Threats

 Ideal Synergies


Lulu
Although very squishy, has very good poke, long ranged painful autos and very good disengage. If she gets ahead, she'll be trouble.


 Synergies

|
Hello everyone, welcome to my Braum guide! My name is Jovy, and I'm an admin here on MOBAFire and an avid League player, who's been hooked since late 2011. I started maining support around the middle of 2012 so I've got almost a decade of experience with the role! I picked Braum up on release in season 4 and I've been playing/maining him off and on ever since. Braum is a fantastic team-oriented pick. His whole kit is all about protecting his allies and enabling them to grab kills, either with the help of his crowd control or his surprising early game damage. If you're an LEC or LCS watcher, you might have picked up that he's a pretty consistently popular pick in pro play. This is all because of his enabling playstyle, a good team will be incredible with a Braum at their side. SoloQ doesn't see as much Braum because, well, it tends to be less team-oriented and more chaotic. Nevertheless, certain team comps benefit immensely from Braum, and he can shut down key enemy champions as well, which makes him invaluable in certain games! |

Braum, the Heart of Freljord - a top tier tanky support, similar to the likes of Alistar and Leona. He's got decent damage, good CC and thus good peel, many poro friends and, according to lore, everyone likes him. Has he any drawbacks at all? Just a few.
 |
- Vulnerable to poke: Like most melee champions, Braum has to be careful when laning against ranged enemies, for they can poke him down with either ranged abilities or autoattacks. Although Braum's E can lower the amount of damage Braum takes from poke, E has a large CD that's best saved for trading. |
 |
- Can't poke efficiently: Not only do you have a problem dealing with poke, but also with poking yourself. You have one ranged skillshot with which to poke with, but, unfortunately, using it too often in lane will cause you to have low mana. Additionally, it can be evaded/intercepted with some effort and, when it does hit, it doesn't do as much damage as you might like it to. |
 |
- No sustain: Although you are tanky, you have no sustain bar your health regen and potions, if you buy them. This can be a problem if you get poked down too much, as you'll be forced to go back. Utilising your E and W, you can avoid dropping too low on HP, but this will deplete your mana supplies. All these together mean that Braum in general has a pretty weak laning phase. |
And as for the advantages:
 |
+ Many slows, stuns and more: A lot of crowd control, good for both protecting your allies and destroying your enemies, as well as for engagements and disengagements. His Q and R slow enemies, and his R also knocks enemies up, and then there's his passive, which can apply multiple stuns to multiple people in teamfights with just an auto-attack from you. Extremely valuable in teamfights and lane phase. |
 |
+ Amazing peel: Being able to apply slows and stuns so effortlessly make peeling for your team extremely easy. If anyone jumps on your ADC, it's enough to just slap him a few times with your AA and he'll be stunned. After the stun wears off, you can easily hit your Q, ult or exhaust. Whatever's necessary. |
 |
+ Roam and gank potentional: Again this is where your CC comes in. Not only is Braum a great roamer (good movement speed with boots, a gap closer and CC) but he's great when recieving a gank, as he has great follow up and engagement. |
 |
+ Tanky: Good tank stats that are also boosted when you use your W make Braum very durable. When stats alone aren't enough, you have your E which basically nullifies all damage heading towards you. This makes you a nice sponge in teamfights, amazing in 2v2 duels bot lane and overall a huge pain to play against. |


|
Font of Life tags enemies whose movement you've impaired and allies who then attack this target get slightly healed. A good choice for someone with as much CC as Braum. |

|
Braum benefits greatly from health as it will make him both tankier and a bit physically stronger since his Q scales with it. Overgrowth is an easy choice to boost your max HP for free. |


Braum's bread and butter. This ability is what makes Braum such a strong 2v2er and teamfighter, for he can apply a stack on anyone on their team and his allies can quickly stun them.
Once an enemy is stunned, he cannot gain any stacks in the next 8 seconds, but during this time he will take bonus magic damage from Braum's AAs. Although the magic damage is pretty insignificant in teamfights, in lane it can be rather useful, so make sure to take advantage of the magic damage as well.
Enemies will not just stand in your melee range or run into your Qs, and in fact as soon as they get one stack they'll probably run for the hills. This is why you need to be clever when using this passive. In lane a good way of applying a quick stun on the enemy is this: walk up to (or use your W on a minion to get in melee range) the enemy (support) and AA as many times as you can before they run out of range, this will usually be after one or two AAs. Once they're out of melee range, Q them. Now they have at least two stacks and are slowed, giving you time to squeeze in at least one more AA, if not two. Even if you don't stun them, you chunked them for a good bit of health with the magic damage from Concussive Blows and your basic attack damage.


|
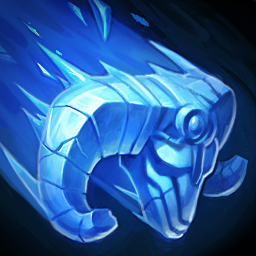
Braum propels ice from his shield that travels forward in a line, dealing magic damage and slowing the first enemy hit by 70%, which decays over 2 seconds. |
His other bread and butter! This is your only "spammable" ranged ability and so it is utilised for poking as well as engaging.
Poking with this ability doesn't just consist of aiming it and pressing a button. If you use it from long range, it will not only be more difficult to hit, but it will also be something of a waste even if it does hit. Why? Because it's very mana inefficient. This because, for one, it costs a rather considerable amount of mana, especially when spammed. For two, it doesn't really do much damage, especially at earlier levels and when you haven't gotten any HP items. So in order to utilise it efficiently, make sure to couple your Q with either some AAs from you, or some AAs/abilities from your ADC. Using it without any "backup" will result in you going OOM, and your enemies still having an adequate amount of health.
In teamfights this ability can be used as an effective engagement tool. Using this applies a stack of your passive, which is basically a signal for your team to attack, especially your ranged teammates. Hitting your Q at a start of a teamfight is basically a free stun, and a free kill or at least a free flash-burn.
In lane, when engaging, be sure to follow the instructions from above. Before using your Q, AA your enemies in order to be able to land a quick stun before they run out of range.


|
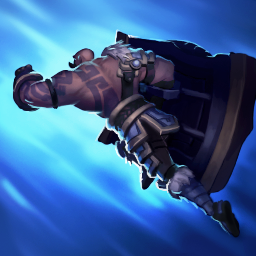
Braum leaps to a nearby ally, positioning himself between his target and their nearest enemy champion. On arrival, Braum and his friend gain bonus armour and magic resist for 3 seconds. |
Aside from being a run o' the mill gap closer, it will grant you and your ally a good bit of bonus MR and armour. You can also self-cast this ability so that you gain these stats when you are alone and taking damage from enemies/tanking a tower/dragon/a minion wave/etc.
This ability may also be utilised as an escape in certain scenarios. This is only possible if there's minions or an allied champion nearby in a convenient position.
But there are many more uses to this ability. Getting to lane quicker - by bouncing onto the lane friend ahead of you or a minion. Then there's leaping onto your lane friend during 2v2 fights so you are both tankier. Additionally, it is possible to leap over some walls and terrain if an ally is on the other side. This is possibe at the Baron and Dragon pits.
And finally, using it to get in melee range and engage fights. This you do by leaping onto a minion that has positioned itself just in front of your enemy laner. This will put you in the position between that minion and the enemy, and in very close range of that enemy. You can now, if close enough, AA them to apply stacks, or, if not close enough, Q them.
Additionally if possible, you can flank your enemies using this ability by bouncing onto a minion once the enemy has gone past the caster minion line. Using your W in such fashion is something that could be quite useful when you are roaming (or ganking) another lane.

Braum's final bread and butter. I promise.
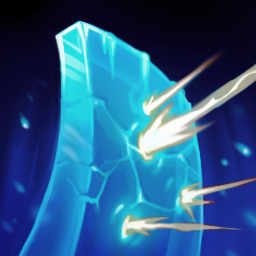
So, bluntly put, this shield is ridiculous. It will basically nullify all damage heading for you, and it lasts for a whole 3-4 seconds.
The most obvious use of this ability is during trading in bot lane, or if that wasn't obvious - now you know. When your ADC starts fighting the enemy ADC, get in between them (either by walking if you're close enough, or using your W otherwise) and use this ability. Now your ADC and you will take near to no damage, whereas the enemy will still take a considerable amount.
Next, blocking abilities. Things like
But why stop there? Blocking damage? Puh. Block things like

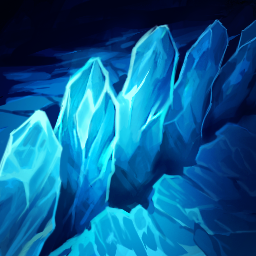
Actual final bread and butter. Nah, kidding, but it's pretty good. This is an AoE slow and knock-up, that does a good bit of damage and, frankly, is very pleasing to the eye.
Although it's relatively long range, it's somewhat slow and enemies can dodge it if they see it coming, especially if they have some sort of gap closer. This is why you should try to use this while your enemies are slowed with Q, or some ally ability, or, better yet, when they're stunned.
When to use it specifically? Generally it's best used in teamfights, when your enemies are clumped up together. This ability sets up for many combos, such as


|
You take Q at level one and max it first. This is so that it has a shorter CD and does more damage, as this is your primary way of engaging and poking. |

|
You take your first point in W at lvl 3 and max it last. Alternatively, you can choose to put the first point in at lvl 4, but it's safer to do it sooner as you might need it in case of a gank. |

|
First point is taken at lvl 2, as this is when the first duels occur in bot lane. You max it second, and maxing it will increase the duration and lower the CD. |

|
As with all ultimates, you put a point in R every time you are able. Level 6, 11 and then 16. |


|
Steel Shoulderguards are the obvious starter item for melee tank supports. Steelguards and their upgrades give you health, a very valuable stat for tanks, a bit of AD and passive gold generation. |

|
Health potions are necessary because as a melee support, you'll be in danger of getting poked down. If you're too low on health to engage, then you are basically useless. |


|
The stats are great and the passive has excellent synergy with Braum. Ulting near an ally summons a "storm" around you which slows and burns the enemies. |


|
Frozen Heart is a good armour choice which you should specifically pick up if you're struggling to fight champions who rely on attack speed - Jax, Vayne and Tryndamere for example. |

Before jumping into Braum-specific gameplay, I'd like to talk about certain general points of gameplay for support players. This includes, roaming, a word on timing spells and camps, a word on the importance of communication, the issue of kill-stealing and, finally, wave management.

Roaming involves leaving your lane in order to gank another. You've got a lot of CC so ganking is very easy and it is encouraged that you roam at least a little each game if it's possible.
Bad times to roam:
 |
Bot lane is pushed to your tower: In this scenario, leaving your lane would mean, at best, losing bottom tower. At worst, they could tower dive and kill your ADC, then take tower. |
 |
Your AD has just arrived to lane after having recalled: This means that he's been off lane, missing CS, and if you leave him now he'll get zoned and lose even more. |
Good times to roam:
 |
When you're playing against a passive lane: This means there won't constantly be fighting bot lane and you're free to sneak off mid lane for some action. |
 |
When you've just recalled: Before heading bot lane, sneak off to top or mid lane and do a quick gank. |
Where you roam, as in which lane, depends on your team as well as the enemy team. Although mid lane is closer, it's arguably more difficult to gank, because the lane is shorter - meaning there's less distance between the enemy and their tower. If they're nowhere near their turret, there's still several exits from mid lane, whereas bot and top there's only the one towards river and the one toweards the tower.
That said, if the enemy mid laner is one that's easy to gank - no gap closers or their Flash is on CD, no CC or low CC/unreliable CC, squishy or on low HP - in spite of the fact that mid is tougher to gank, it's a good idea to do so.
The same can be said about top lane. It's an easier lane to gank, but it's far away and therefore it's riskier. For one, because your ADC will be alone for a long time, and, for two, because it'll take you longer to get back to your own lane if the gank is unsuccessful, meaning you'll lose out on more XP/gold than you would if you failed a mid lane roam.
A successful mid or top lane gank can secure a Rift Herald or Dragon, towers, or just kills for your laners - unless you steal 'em (try not to!).

Traditionally the support is expected to keep track of and remind the team of certain in-game timers. This is probably because supports don't have to CS, so they have some extra time and brain power to spare. Keep track of summoner spell cooldowns (especially Flash, which is 5 minutes) and Dragon/Baron timers and ping them when they are about to spawn. I ping each time when there is 1 minute until Dragon or Baron spawn, to make sure my team doesn't forget to recall and start heading that way if necessary.

League of Legends is a team game and it requires good rapport between you and your fellow teammates. But bot lane especially is the lane which requires the most trust & communication, since you are two people working together towards the same goal, like the symbiotic relationship between some fishies and sea anemones. You keep your ADC safe, farmed and happy and they'll reward you with a nice victory screen.
When you are playing solo though, you'll need to rely on the chat and the pings. Chatting in the middle of the game is probably ill-advised, as it's not a particularly slow moving game, especially in laning phase, this is why you will have to learn to use your pings properly. The help ping when you are trying to escape (it'll notify your ADC to come to you so you can E off him or counter-engage), the danger ping or retreat ping when you notice a foreigner near bot lane. Most importantly you'll want to notify your ADC about the cooldowns of your spells and abilities (alt+click on ability/spell). If you notify your ADC that your exhaust isn't up for another 20 seconds, they'll know to patiently wait before an engage, or to play safe.

When it comes to games like these, you will occasionally get frustrated. Perhaps at yourself, more often at your ADC. I won't tell people how to play their games, but I will advise against flaming either way. Disregarding the fact that it's real people behind these screens, controlling those champions, with real feelings and all, flaming is nonconstructive and will lead to more mistakes, possibly AFK situations or intentional feeding from a disgruntled teammate. Instead, be nice. ADC got a kill? "Wow nice" "damn, good job" "wp". Short, sweet, to the point, doesn't even need to be true. Positive comments makes people feel good and play good :)

Everyone likes getting kills and having good scores, but when playing support it is best to leave as much to your allies as possible. Although you could go for some nice 200g to upgrade your boots, having the money on virtually anyone on your team is far more valuable. Think about it. Would you rather have
But Jovy, I hit the-... and I did the- ... and he--!! Yes, great, you're a beast. But you're not doing your team any favours if you get all the kills, even if all you buy are team-beneficial items. You are a support - you support your team and do everything you can to get them ahead!
When someone is getting away and you're sure your ally won't be able to get it, that's when it's fine (and obviously preferable) for you take the kill yourself. Sometimes you'll even get flak for that, like they might argue that they may have gotten the kill if you didn't take it and yadda yadda. Hindsight is 20/20, so if it looks like they might well get away, it's better to just secure the kill then let it go to waste.

When it comes to the support role, there's more to it than just playing the champion. You need to be a great communicator, you need to know where and when to ward and you need to understand wave management. So to start off the gameplay chapter which will also include details about laning phase, roaming, teamfighting, trading, combos and god knows what else, I will talk about wave management.
Managing the minion wave ensures that your ADC gets as much farm as he can. This is important because farming = money and money = good items which in turn = strong ADC. And as the old proverb goes, happy ADC = happy life.
|
First Wave In bot lane you'll get level 2 after 9 minions die (so mid second wave, 6 melee and 3 ranged minions in total). By helping your ADC during the first wave, you can get an edge and get level 2 before your enemy laners do. You do this by simply auto-attacking the minions down to low HP (so that the ADC needs only to last-hit it). If you start attacking a minion that's already half HP or less, you risk ruining it for the ADC (AKA it might die before the ADC has a chance to last hit) so you have to be careful not to make your ADC lose out on gold for nothing. Whichever side's 9 minions die first is the side that will get level 2, which is why you want to accelerate the process by auto-attacking. Once you get level 2, you'll have higher stats and an ability extra and that might be enough to land you a level 2 kill.  |
|
Under Tower Although as a support you won't need to last-hit minions almost ever, it's still important for you to help your ADC do it. Especially under towers. Tower shots will kill a full health melee minion in 3 hits, and a ranged minion in 2. After 2 hits, the melee minion will have but a sliver of health, and thus it'd only take one AA from your ADC to kill it. If the minion is full HP, don't interfere here. For ranged minions though, the tower will hit it once and leave it at around 30%, and an ADC (pre first back) won't be able to kill it with one shot, and won't have time to kill it with two. This is where you come in to AA it once. That's about it. When they're not at full HP, you just have to wing it. You'll get good at it with practice.  |
|
Holding the wave If you're in lane and your ADC isn't, you can hold the minion wave for him so that the minions don't die to the tower. You do this by simply standing in the way of the minions and making yourself their target. If your minions are around, you can hold the wave by only last-hitting minions (so they don't go to waste), but don't attack them or you'll push the wave/kill most of the minions and your ADC won't get anything out of that. If you're low level, don't tank the minions for too long because they can pack a punch and you don't want to get too low and then not be able to engage or fight the enemy laners. If there are enemy champions nearby you should be careful as well.  |
|
Pushing the Wave You generally push the wave with your ADC when the enemy bot laners aren't there (AKA they died or just recalled). This is done by continously auto-attacking (but making sure not to ruin the last-hits) the minions and you can also cast your E and Q on them of course. Once they all die, your minions can journey onwards to the enemy turret and die. This way the enemy bot laners will lose out on the gold & exp they'd normally get from killing that wave. If the wave is too close to your tower or in the middle of the lane, you won't be able to push it all the way to their tower before they're back so it's best to freeze it in that position and recall yourselves. If you do push it anyway, there's a good chance they'll arrive in time and freeze the minion wave near their tower thus forcing you to be nearby their tower so your ADC can CS, leaving you vulnerable to ganks.  |


Firstly, you need to utilise your
|
First wave: Last-hit two MELEE minions. Do not bother wasting your stack(s) on caster minions, as they give you less gold. Third wave: By the third wave you'll have regained a third stack, which you will use to kill the cannon minion. These minions grant the most gold and you'll want to kill these every time. They spawn every 3 waves. |
After the third wave keep saving your stacks for every third wave until your Shoulderguards upgrade. Once you've collected 500 gold you'll be able to consistently keep bot lane warded; so it's extremely important to be on top of your CS-ing and get the upgrades ASAP!
Now level one Braum is not exactly the strongest champion in the game. Depending on the match-up, you will either want to chill in the back and approach only to get the Shoulderguards stacks (this is when you're against a ranged, especially pokey, support) or (if you're against a melee support) you'll be able to assert some dominance without being scared of getting poked down. The important thing is, whether you're against a ranged or melee support, NOT to get poked down. If you take too much damage, you can kiss a level two fight goodbye.

What comes next depends on at least three factors.
|
1) Who got level 2 first? If you got level 2 first, it's usually a no-brainer. You're stronger, healthier and you've got an extra ability on your opponent. If you haven't gotten poked down and you're in a favourable match-up, you may want to get 2) Are you low? If you got poked down too hard at level 1, even if you get level 2 first you will probably want to err on the side of caution, unless the enemy is very low as well. 3) Who are you up against, again? Now if you're high on health and you've gotten level 2 first, chances are whomever you're against is in hot water. However, if the enemy is ALSO level 2, and you're all equally healthy, then you may have to pause and consider the match-up. Do you win a straight up 2v2, or can they turn it around in their favour if you engage? |

How do I know if I'm getting ganked? Wards. By now you should have your Eye item and you better use it. Having Dragon and Tri brush warded is usually enough to ensure your safety, but wards are useless if you haven't got good map awareness. Every few seconds you must look at the map, especially if your team has pinged that their lane has an enemy missing, to make sure nobody is heading bot lane. Another thing to look out for is the
Having your ult also means that your ganks are more potent. Roaming around this time is encouraged.

Team fights start occuring around the time lane phase ends and mid game begins, and they don't stop until one of the Nexuses turns to shards. Usually teamfights are connected to objectives - towers, inhibs, Dragons, Barons, even regular buffs and the Scuttler. People will find any excuse to fight these days.
There's a few roles you play in teamfights:
|
1) The Tank As you're a bulky durable support, sometimes the only thing you end up doing in a teamfight is soak up a lot of damage. In no sense is this a bad thing. I mean, either you take 2k damage or your AD does, and they die. 2) The Peeler Sticking to your ADC like glue, not leaving him unless you have to and peeling off assassins, bruisers and all sorts of other nasty things off of him using your abilities and 3) The CC Machine CC as many people as possible. You can apply 4) The Initiator Braum has some decent catch potential with his long ranged slow and knock-up. You might end up being the one who engages the teamfights, but usually you will want someone else in the team (your jungler or top laner, as they tend to be engagers/tanks like you) to do this instead so that you are free to peel and assist. 5) That Guy Who Got Caught And, well, sometimes you're that guy. |

And that concludes my guide. I hope you found it helpful, thanks for reading and good luck on the Rift!
If you have any comments, suggestions or questions, please feel free to post in the comments or send me a private message. I will read everything and reply to all questions and criticism. I've written a couple other other guides, and, if you liked this one, checking them out would be appreciated ♥
Thanks to my friend Shea for helping me keep the build & guide updated :) I warmly recommend checking out his guide on GP and TF if you also play mid lane!


 11,489,648
 155
155




You must be logged in to comment. Please login or register.