


Not Updated For Current Season
This guide has not yet been updated for the current season. Please keep this in mind while reading. You can see the most recently updated guides on the browse guides page
x
 Master Yi Jungle | FalleN3's Guide to Master Yi
 Build Guide By FalleN3
Follow


318
19
 1,022,944
Views
1,022,944
Views
 18
Comments
18
Comments
318
19
1,022,944
Views
18
Comments
Master Yi Build Guide By FalleN3
1,022,944
Views
18
Comments
Master Yi Build Guide By FalleN3
Follow
x
Did this guide help you? If so please give them a vote or leave a comment.
You can even win prizes by doing so!
Vote
Comment
I liked this Guide

I didn't like this Guide
 Thank You!
Your votes and comments encourage our guide authors to continue
creating helpful guides for the League of Legends community.
Recommended Items


Runes:
Precision


Domination


+10% Attack Speed
+9 Adaptive (5.4 AD or 9 AP)
+6 Armor
Items
Boots Choices
![]()

Ability Order

Double Strike (PASSIVE)
Master Yi Passive Ability


Threats & Synergies
 Threats
 Synergies
Extreme
Major
Even
Minor
Tiny
 Show All
None
Low
Ok
Strong
Ideal
Extreme Threats
 Ideal Synergies


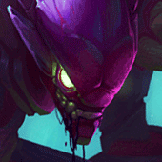
Evelynn
She is a very annoying champ to play against and I ban her quiet a bit. As the game progresses she will be able to 100-0 you every, over and over. You will need to pick up some MR in this match-up. After 6 when she become invisible :( QQ


 Synergies
Ideal
Strong
Ok
Low
None


Champion Build Guide
About Me
 Master Yi is a melee AD (Hyper Carry) Assassin that can be played in the Jungle. He is quite often frowned upon by the league community as a no skill, no brain champion but this couldn't be further from the truth. True, he doesn't have any skill shots and has no complicated mechanics but that doesn't take from the fact that you still need great decision making, positioning, focus and patience among other skills to excel with him as a champion.
Due to the fact that he can be a hypercarry it's possible that he can single-handedly carry a game if the person playing him is skilfull enough. He has excellent jungle camp clear and can take down turrets and objectives exceptionally quickly.
He scales well into late game and his damage output is very high once he gets a few items.
In my opinion Master Yi is easy to learn but difficult to master and relies heavily on excellent positioning from the mid-game onwards.
He is a great split-pusher and a very effective duelist.
|
Hi, welcome to my Master Yi guide. I'm FalleN3 and I've been playing League of Legends since season 2. I mostly play mid lane or jungle on the EUW server. I enjoy playing aggressive champions that enable me to take risks in my games. I like to play champions such as Master Yi, Twitch, Fizz, Akali, Annie & Orianna among others too. I stream Monday to Thursdays at 6pm GMT+1 until 9pm GMT+1. I am a pretty chilled and relaxed streamer and try my utmost best to offer a chilled place to hang out and watch some league. |
Due to the fact that he can be a hypercarry it's possible that he can single-handedly carry a game if the person playing him is skilfull enough. He has excellent jungle camp clear and can take down turrets and objectives exceptionally quickly.
He scales well into late game and his damage output is very high once he gets a few items.
In my opinion
He is a great split-pusher and a very effective duelist.
|
PROS
+ Relatively easy to play + Easy to farm + High Amount of Damage + Can heal quite a bit and surprisingly tanky with + Strong 1v1 Potential + Quick to take towers and other objectives + Great jungle clear + Possibility to Hypercarry |
|
CONS
- Has no CC and is vulnerable to others CC - Squishy - No 'real' escape but can ult to run away - The higher rank you become, the more difficult he is to play - Easy to learn but difficult to master - Often relies on riskier plays (high risk, high reward) |
↑Back to top
Runes
|
|
Conqueror: Basic attacks or spells that deal damage to an enemy champion grant 2 stacks of Conqueror for 6s, gaining 1.7-4.2 Adaptive Force per stack. Stacks up to 12 times. When fully stacked, heal for 15% of the damage you deal to champions. This is a solid choice on |
|
|
Triumph: Takedowns restore 12% of your missing health and grant an additional 20 gold. |
|
|
LEGEND: ALACRITY: Gain 3% Attack Speed plus an additional 1.5% for every Legend stack (max 10 stacks). Attack Speed works really well on |
|
|
Coup de Grace: |
|
|
Sudden Impact: After exiting stealth or using a dash, blink or teleport, dealing any damage to a champion grants you 7 Lethality and 6 Magic Penetration for 5 seconds. This is a solid choice on |
|
|
Ravenous Hunter: Heal for 1.5% (+ 2.5% per Bounty Hunter stack) of the damage dealt by your abilities. Earn a Bounty Hunter stack the first time you get a takedown on each enemy champion. Any bit of extra healing is welcome. |
↑Back to top
Summoner Spells
|
|
|
|
|
|
↑Back to top
Items
Starting Items:
|
|
|
|
|
|
|
|
|
Boots Options:
|
|
|
|
|
|
|
|
|
|
|
|
Standard Items:
|
|
|
|
|
|
|
|
|
|
|
|
|
|
|
|
|
|
|
|
|
|
|
|
|
|
|
|
|
|
|
|
|
|
|
|
↑Back to top
Abilities
-Skill Order-
|
1 |
2 |
3 |
4 |
5 |
6 |
7 |
8 |
9 |
10 |
11 |
12 |
13 |
14 |
15 |
16 |
17 |
18 |
|
|
|
|
|
|
|
|
|
|
|
|
|
|
|
|
|
|
|
|
|
|
|
Q |
E |
W |
Q |
Q |
R |
Q |
E |
Q |
E |
R |
E |
E |
W |
W |
R |
W |
W |
Double Strike
|
|
If Double Strike’s first hit kills a unit, the second strike now searches for a new target within 300 range (prioritizes killing blows). |
|
Alpha Strike
|
|
You will reappear at |
|
Meditate
|
|
Although it doesn't give you a massive increase in defensive stats / health regeneration |
|
Wuju Style
|
|
Passive: Increases Master Yi's bonus attack damage by 10%.
Active: |
|
Highlander
|
|
Active: For 7 seconds, Master Yi gains 35/45/55% Movement Speed and 25/45/65% Attack Speed and becomes immune to any slows. While active, kills and assists extend the duration by 7 seconds. Steroids!! |
|
↑Back to top
Jungle Camps / Timers
Spawn Timers:
It is useful but not necessary to know the spawn timers so that you can remember from muscle memory roughly when the camps are about to respawn.
|
|
Wolves, Raptors Spawn At: 1:30 Respawn Time: 2:00 Gromp, Krugs Spawn At: 1:42 Respawn Time: 2:00 Buffs (Blue Sentinel, Red Brambleback) Spawn At: 1:30 Respawn Time: 5:00 Rift Scuttlers (in river) Spawn At: 3:15 Respawn Time: 2:30 Rift Herald (in Baron pit) • Initial Spawn: 8:00 • Respawn: 6:00 • Despawns At: 19:45 (19:55 if in combat) |
|
|
Dragon (Elementals & Elder) Spawns At: 5:00 Respawn Time: 5:00 Elder Dragon: Spawns 6:00 after one team kills their 4th Elemental Drake Elder Dragon: Respawn 6:00 |
|
Baron Nashor Spawns At: 20:00 Respawn Time: 6:00 |
ELEMENTAL DRAGONS
|
|
Cloud Drake: • 10/20/30/40% ultimate CDR, ignoring the CDR cap Cloud Dragon Soul: • Passively gain 10% increased movement speed. • After casting your ultimate, gain an additional 30% movement speed for 3 seconds (30 second cooldown). |
|
|
Infernal Drake: • +5/10/15/20% Attack damage and Ability power Infernal Dragon Soul: • Every 3 seconds, your next attack or damaging spell creates a small AoE explosion, dealing adaptive damage that scales with bonus attack damage, ability power, and bonus health. |
|
|
Mountain Drake: • +8/16/24/32% Armor and Magic resist Mountain Dragon Soul: • After not taking damage for 5 seconds, gain a shield that lasts until destroyed. The shield’s magnitude scales with bonus attack damage, ability power, and bonus health. |
|
|
Ocean Drake: • Restores 5/10/15/20% missing health regen per 5 seconds Ocean Dragon Soul: • Dealing any damage triggers strong health and resource regeneration for 3 seconds. In addition, Damage to minions provides less regeneration. |
|
|
Elder Dragon: • Spawns 6:00 after one team kills their fourth Elemental Drake; 6:00 respawn • Buff duration is 180 seconds; • Each champion that has the buff loses it upon on death • Damaging an enemy at less than 20% health causes them to die in an Elder Immolation after 0.5 seconds (no cooldown). However, you cannot execute enemies through invulnerability effects like |
BARON NASHER
Baron Nashor is the most powerful neutral monster on Summoner's Rift. Killing Baron Nashor grants Hand of Baron to all living teammates for 180 seconds. The buff gives each champion on your team up to 48 attack damage and 80 ability power (scales with game time). Empowered Recall (Recall channel time is reduced to 4 seconds (down from 8), and an aura that greatly increases the power of nearby minions. Respawn Time: 6:00
RIFT HERALD
Rift Herald is a melee attacker that that is resilient to ranged attacks (She takes 35% reduced damage from ranged basic attacks), but is vulnerable to attacks to the eye on it's back from behind, dealing 12% of it's Maximum Health as bonus true damage.
Once the Eye of the Herald is dropped but not picked by the slaying team, it will disappear after 20 seconds. Once picked up, Eye of the Herald will replace the trinket in your trinket slot. The Eye lasts for 4 Minutes after which time, if not used it will be lost. It also grants Empowered Recall and the ability to summon this monster to push a lane. You can break it (activate it) to summon the
The summoned Rift Herald will head to the closest lane and start pushing it.
↑Back to top
How to Play
REMEMBER: Games are won by destroying enemy Towers/ Inhibitors and eventually the Nexus, they are not won by your KDA.
Try to save your
Teamfighting:
Teamfighting can be very difficult as a
It's absolutely 'crucial' when you are playing
In an ideal world you would focus the enemy Mid Laner or AD Carry, but quite often in order to do this you might have to over-extend quite a bit. Generally, risky play for high rewards.
ADC / Mid Laner -> Support -> Jungle -> Tank
After a Teamfight:
If your team has won - Assuming you are not dead, now you need to look for objectives to take. How low health are you, do you have life steal? Is it possible to take an enemy tower, inhibitor, dragon, baron, rift herald etc.. ? Are your teammates healthy enough to help on objectives. Perhaps there is nothing to take and you simply need to return to base and reset/buy.
If your team has lost - Assuming you are not dead, back off to safety as quickly as possible and begin to assess what the enemies next move will be. What objectives are they going to look to take, your tower, inhibitor, baron, dragon etc... ? Now you need to either plan a way to try to stop them from taking the objective or recall and reset back to the game at hand.
Taxing a lane:
After a successful gank, generally when your wave is pushing into the enemy tower you can take a minion tax. Generally your teammates will not like when you tax their lane but it's acceptable to tax a little. If you spend the time ganking a lane, this means that you are not farming - therefore you need to tax the lane a little to make up for what you lost. Some people, no matter what ELO they are in will simply not understand your reasoning for taxing their lane, so be careful of the rage kids and be mindful of an allied champion that is looking to freeze their lane. If they are trying to freeze their lane and you tax 2-3 minions ... you can put them in an awkward position.
I'm not talking about taking an entire wave here, just a couple of minions.
If you gank a lane and you get the kill: 1 - 2 Minions (Not the Cannon Minion)
If you gank a lane and your teammate gets the kill: 2 - 3 Minions (Not the Cannon Minion)
Try not to tax a losing lane at all and try not to tax bot lane heavily, especially if you get the kill!
Tower dive, no problem:
The ability to easily tower dive is a great part of
Escape Potential:
↑Back to top
Conclusion
Well, that's the end of the guide and I hope you have found it an interesting read and that it might help you to improve. If not that, at least some food for thought, so to speak.
It's not all about winning/losing guys, at least we get to play the game!
Thanks for stopping by,
FalleN3
↑Back to top
Changelog
 Spoiler: Click to view

 Twitter
 Facebook
 YouTube
 Twitch
Master Yi Jungle | FalleN3's Guide to Master Yi
You must be logged in to comment. Please login or register.