


Not Updated For Current Season
This guide has not yet been updated for the current season. Please keep this in mind while reading. You can see the most recently updated guides on the browse guides page
x
 [S6] Rek'Sai - The Queen of the Jungle
 Build Guide By TheSinnohScrolls
 23,634
Views
23,634
Views
 0
Comments
23,634
Views
0
Comments
Rek'Sai Build Guide By TheSinnohScrolls
0
Comments
23,634
Views
0
Comments
Rek'Sai Build Guide By TheSinnohScrolls
x
Did this guide help you? If so please give them a vote or leave a comment.
You can even win prizes by doing so!
Vote
Comment
I liked this Guide

I didn't like this Guide
 Thank You!
Your votes and comments encourage our guide authors to continue
creating helpful guides for the League of Legends community.


Recommended Items


Spells:

Flash

Smite
Items
AD Items
![]()

Ability Order

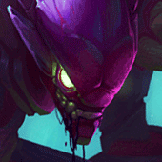
Fury of the Xer'Sai (PASSIVE)
Rek'Sai Passive Ability


Threats & Synergies
 Threats
 Synergies
Extreme
Major
Even
Minor
Tiny
 Show All
None
Low
Ok
Strong
Ideal
Extreme Threats
 Ideal Synergies


Aatrox
Green = Bad first clear, should invade Yellow = Might be low life or not, depends Red = Either they have a good clear or can 1v1 you, so you shouldn't invade


 Synergies
Ideal
Strong
Ok
Low
None


Introduction
|
|
,,,,, |
Hello there, Summoner! My name is TheSinnohScrolls and this is my She's a top rated jungler ever since her release and mastering her can be quite rewarding because of her strong presence in-game and her really effective ganks. |

Items
Why Tracker's Knife?
After testing with the different smite options available, the 2 that are most effective are
Later I realized that, not only the
Dead Man's Plate and Boots of Swiftness
If you noticed earlier,
The reason I buy
Offensive Items
These items are great for making you tanky and at the same time make you a threat because they have a good balance of tank stats and damaging stats. Combine that with the perks from the Resolve Skill Tree and you'll do a lot of damage and still be a damn good front-liner!
Abilities
|
|
Passive: Fury of the Xer'SaiRek'Sai does not use a resource. Instead, her passive generates Fury that regenerates health while burrowed. It is a great tool for long clears as it provides some sustain while in the jungle. |
|
|
Q: Queen's WrathThis is Rek'Sai's main damaging ability, it resets her auto-attacks even against structures, so make sure to keep that in mind for maximum damage efficiency. |
|
|
W: BurrowUse this to change between burrowed and unborrowed state, giving you tremor sense. Pay attention to your surroundings to see if there are any enemies nearby, it will even show invisible enemies. Keep in mind that champions will have a larger indication than monsters (don't get scared of the Rift Scuttler, hahahaha). |
|
|
E: Furious BiteRek'Sai's E ability is also a great damaging tool, since its damage increases by the amount of Fury available. An interesting note is that, at maximum Fury, |
|
|
Burrowed Q: Prey SeekerSince this ability deals Magic Damage, it won't be used as a damaging tool. Instead, since it reveals enemies, it is used as a long range Scouting tool, since, while burrowed, |
|
|
Burrowed W: UnburrowThis ability is probably the most important ability while ganking along with NOTE: You can use |
|
|
Burrowed E: TunnelRek'Sai's unique mechanic of setting down tunnels is a vital part of her kit. It has many uses: gap-closing, escaping, crossing terrain and vital for Here are some good locations for you to use your -Base (for easy escapes) -One for each jungle quarter -Baron / Dragon -As many near lanes as possible for easy counter-ganks |
|
|
R: Void RushRek'Sai's ultimate is mostly used as utility, since it has no direct offensive capabilities. It is a double-edged sword, because at level 3 she has all ganking tools at her disposal, but at level 6 falls short to most junglers who have a more impactful ultimate ability, like Using this ability correctly relies on having many Tunnels across the map for global pressure. It is mostly used to get back to farming after a Recall, but can be vital for cross-map plays, returning full-life to a teamfight, escaping (it's super fun to do), and many other uses. |
Pros and Cons
PROS+ Resourceless + Great ganks pre-6 + Great sustain + Global presence + High mobility |
|
CONS- Reduced sight - Melee - Level 6 gank isn't as strong - Must have many tunnels - Reliant on teammates |
Invading and Clearing
Because of our void mistress's passive, it is really easy to clear jungle camps if done correctly. Try to reset you auto attacks using
As I was saying earlier, Rek'Sai is great at invading. To do this properly, you should know how good the enemy jungler's first clear is. Examples of junglers with a bad first clear:
NOTE: ALWAYS look at your minimap for any suspicious moves by the enemy laners. Even if you do blow the enemy jungler's
As Rek'Sai, you always want to keep pressure on the opposite jungler, so ward often (more on this later) and steal their camps when possible, and always scatter the map with Tunnels.
Ganking
Here are a few tunnel locations to help you get into position to gank really easily. Keep in mind that there are endless possibilities of tunnels.
(Note that I've only taken pictures from the blue team, but can be applied to the opposite lane, example, the top tunnel can be used in red team bot lane and vice versa).
> Top Lane
> Mid Lane
> Bot Lane
Warding
Teamfighting and general playstyle
Note: Maybe the most effective method to engage or pick someone off is to
Conclusion
THANK YOU FOR READING MY REK'SAI GUIDE!
This is it. I hope you enjoyed not only the guide, but the champion as well. Please comment, as this is my first guide and I'm curious to see what the MobaFire community has to say about it :)
Any suggestions to add to this post or for me to make a guide for another champion (as long as I can play it, of course, hahahahah), let me know. I'll do my best.


TheSinnohScrolls
Rek'Sai Guide
[S6] Rek'Sai - The Queen of the Jungle
You must be logged in to comment. Please login or register.