


Not Updated For Current Season
This guide has not yet been updated for the current season. Please keep this in mind while reading. You can see the most recently updated guides on the browse guides page
x
 [10.17] Kryptid's Guide to Nami
Follow


15
2
 27,720
Views
27,720
Views
 7
Comments
7
Comments
15
2
27,720
Views
7
Comments
 Nami Build Guide By Kryptid NA
27,720
Views
7
Comments
Follow
x
Did this guide help you? If so please give them a vote or leave a comment.
You can even win prizes by doing so!
Vote
Comment
I liked this Guide

I didn't like this Guide
 Thank You!
Your votes and comments encourage our guide authors to continue
creating helpful guides for the League of Legends community.
Recommended Items


Runes:
Sorcery


Resolve


+9 Adaptive (5.4 AD or 9 AP)
+9 Adaptive (5.4 AD or 9 AP)
+6 Armor
Spells:

Exhaust

Flash
Items
Ability Order

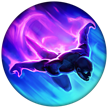
Surging Tides (PASSIVE)
Nami Passive Ability


| About Me |
|
|
Hello MobaFire! I’m Kryptid and I’m from North America. I recently moved to Oceania with the intention to stay here for a year or two. In the past, I never really enjoyed playing League, but I’ve always loved watching it and analyzing everything from jungle pathing, team compositions and build paths. Of all the roles available, I decided to give supporting a shot and ended up Platinum 5 at the end of Season 6. I quickly lost interest and became an analyst for small diamond teams during the start of Season 7. After a few months, I started playing again and fluctuated between Diamond 5 to Diamond 3 until the end of the season. Now in Australia, I’ve decided to put most of my free time to guide writing about |
| About Nami |
|
|
|
Why Nami? |

| Pros |
|
|
+ Best sustain in lane + Safe poking range + Strong kit to engage/disengage + Great teamfighting potential + Synergizes well with every adc Nami's kit is very diverse and can offer healing, damage, crowd control, slows, speedups, engages and disengages. |
| Cons |
|
|
- Extremely squishy from early to mid game - Mana pool is very limited in lane - Aqua Prison is a very predictable CC As mentioned, Nami is extremely vulnerable in lane to burst supports like Alistar, Leona and Brand, where their level two all-in can demolish her. Even out of lane, the first few items of Nami are more aimed toward healing and Ability Power, leaving her quite prompt to be bursted down in a fraction of a second. While Ebb and Flow is a great poking and sustainability, it is quite mana hungry, so it can't be spammed in lane or you'll be left pretty much useless. Another Con of Nami is the predictability of her |
| Advantage |
| Jhin is a rather immobile champion, especially when he is ulting. Nami is a rather perfect counter to Jhin as her ult can cancel Jhin's ult. With the slows and speed ups Nami provides, it leaves Jhin quite vulnerable in teamfights. | Kai'Sa has a really powerful ultimate that sends her behind an enemy champion. It is really easy for Nami to peel for whoever is being targeted. Nami can simply ult towards the rest of their team and clean up the kill on Kai'Sa. | Taric is rather useless if he can't land his Dazzle in lane. With the extra range to Nami's Ebb and Flow, she can easily poke Taric out of lane, leaving the carry helpless. |
| Synergy |
| Jhin gets a movement speed surge when he successfully crits. Combined with Tidecaller's Blessing, the crits, the movement speed, the slows and the increased damage all make Nami x Jhin a lethal duo in lane. Aside from that, if Jhin or Nami successfully land a crowd control on a champion, the other can easily chain the crowd control into another one and secure a kill. | Kai'Sa's ability to dive a team's carry can be well enhanced by Nami's kit. Tidecaller's Blessing will allow Kai'Sa to kill her target faster and followed by Killer Instinct, it gives Kai'Sa a safe way back to the team and a follow-up engage. If you can keep Kai'Sa alive after she kills her target, the rest of the fight is easily drawn out. | Varus kill has a great mixture of crowd control, soft and hard. Varus himself can outduel multiple foes with his kit and core items. Add to that Nami's crowd control and damage enhancement, Varus will be able to kill anyone and survive assassins burst. |
| Disadvantage |
| Braum is Nami's Nemesis. His kit is more focused on crowd control, but both their ultimate are somehow similar. Large AoE crowd control with slow. The bad thing about braum is that his Unbreakable Will can block and deny Nami's Tidal Wave, just like Yasuo's Windwall. The wave stops at the shield and as Braum is most likely frontlining, he can block the massive AoE your ultimate is and turn the engage around. | Brand support is obnoxious to play against for a few reasons. Brand can burst squishies like Nami due to his high base damage, passive and ignite. The range of his Pillar of Flame is greater than Nami's Ebb and Flow, allowing him to poke more efficiently in lane. Playing versus Brand as a support will force you to build Locket of the Iron Solari, because in mid-game and late-game fights, Brand only has to ult your team with Rylai's Scepter built to guarantee a great chunk of damage on your team. | Caitlyn is a powerhouse of the laning phase. Her immense range allows her to trade with Nami's Ebb and Flow and win the short trade, without using mana. After a few Ebb and Flow and manaless, Caitlyn can easily poke and outsustain Nami. |
| Abilities |
|
|
|
Surging Tides (Passive): When Nami's abilities hit allied champions they gain 60 (+20% of ability power) Movement Speed for 1.5 seconds. This effect is doubled for allies hit by Tidal Wave. |
|
|
RANGE: 450 COST: 100 mana COOLDOWN: 110 / 95 / 80 |
Nami's passive allows her to kite well for herself mixed with |
|
|
|
Aqua Prison (Passive): Sends a bubble into the air towards a targeted area. When it lands, it deals 75 / 130 / 185 / 240 / 295 (+50% of ability power) magic damage to all enemies in the area of impact and encases them into bubbles. Enemies hit by the bubble are lifted into the air and stunned for 1.5 seconds before being dropped to the ground. |
|
|
RANGE: 450 COST: 100 mana COOLDOWN: 110 / 95 / 80 |
Nami's Bubble is the ability that separates good players from average ones. It is really easy to predict and dodge due to the slow time it takes to reach its target, so only patient users will be able to use the Aqua Prison efficiently. Using Aqua Prison as an offensive engage will most likely end up in a failure if there is no soft or hard crowd control to land it. It is best to use it when engaged on by the enemy support in lane, as you can turn the fight easily if you cage the enemy carry. Note that Aqua Prison also procs Nami's passive, so don't be afraid to use it when heading to objectives on yourself or allies for the increased movement speed. |
|
|
|
Ebb and Flow (Passive): Unleashes a stream of water that bounces back and forth between allied and enemy champions. On Ally Hit: Heals the ally for 65 / 95 / 125 / 155 / 185 (+30% of ability power) and bounces to a nearby enemy champion. On Enemy Hit: Deals 70 / 110 / 150 / 190 / 230 (+50% of ability power) magic damage to the enemy and bounces to a nearby allied champion. Ebb and Flow can only bounce to each target once and hits up to 3 targets. The damage or healing value is reduced by 15%(-7.5% per 100 AP) with each bounce. |
|
|
RANGE: 450 COST: 100 mana COOLDOWN: 110 / 95 / 80 |
Nami's bread and butter ability. It serves as a poking ability as well as healing and is an amazing team fighting tool. Ebb and Flow can bounce up to three times, allowing you to heal two ally champions and damage one enemy. With this ability maxed out, you can heal for over 600 health and damage for 300 health, for only 130 mana. In lane, it is a really great ability as it can mitigate and heal the enemy poke, poking them at the same time. The mana cost can be a little bit expensive early on, but in the mid-late game, it feels better to use your spells without running out of mana. |
|
|
|
Tidecaller's Blessing (Passive): Empowers an allied champion for 6 seconds or until they have attacked 3 times. During this time, their basic attacks deal 25 / 40 / 55 / 70 / 85 (+20% of ability power) bonus magic damage and slow the target hit by 15 / 20 / 25 / 30 / 35 (+5% of ability power) % for 1 second. |
|
|
RANGE: 450 COST: 100 mana COOLDOWN: 110 / 95 / 80 |
As I mentioned in the Passive, mixing Tidecaller's Blessing with Surging Tides allows an amazing kiting with movement speed, on-hit slow and increased damage. Building Ardent Censer is a great addon to this ability, as it brings some more on-hit damage and sustain. I will explain in skill order when maxing Tidecaller's Blessing second is more effective than Aqua Prison. |
|
|
|
Tidal Wave (Passive): Summons a Tidal Wave outward from Nami's position. The Tidal Wave briefly knocks up enemies that it comes in contact with, slowing them by 50 / 60 / 70% and dealing 150 / 250 / 350 (+60% of ability power) magic damage. The slow duration increases based on how far the Tidal Wave has traveled, with a minimum duration of 2 seconds and a maximum of 4 seconds. |
|
|
RANGE: 450 COST: 100 mana COOLDOWN: 110 / 95 / 80 |
Tidal Wave is a great team fighting engage, but also works well to disengage. The cooldown goes down to under a minute with cooldown reduction to 45%, which means it should always be available for every teamfight, making you a threat. The slow it procures is really obnoxious to play against. The wave moves really slowly so using it as a starting engage will mostly end up hitting no one. It is best to use when someone gets caught too far up the frontline, as it will speed your team up and slow enemies for up to 70% for 2 to 4 seconds, depending on distance travelled. Tidal Wave is a really strong level 6 power spike for Nami in lane, as it will mostly guarantee an Aqua Prison skillshot to follow the wave. Nami's full combo can deal up to 400 damage without any items at level 6, opening opportunities for a free kill. |
| Skill Order |
|
1 |
2 |
3 |
4 |
5 |
6 |
7 |
8 |
9 |
10 |
11 |
12 |
13 |
14 |
15 |
16 |
17 |
18 |
|
|
|
|
|
|
|
|
|
|
|
|
|
|
|
|
|
|
|
|
|
|
|
W |
Q |
E |
W |
W |
R |
W |
Q |
W |
Q |
R |
Q |
Q |
E |
E |
R |
E |
E |
|
#1.
6 / 11 / 16 #2. 1 / 4 / 5 / 7 / 9 #3. 2 / 8 / 10 / 12 / 13 #4. 3 / 14 / 15 / 17 / 18 |
Maxing Carries with a great level two powerspike are more advantaged by Tidecaller's Blessing spike, because of the kiting potential. Lucian for instance, gets his E - Relentless Pursuit second and can use Tidecaller's Blessing's three empowered attacks efficiently. |
| Summoners |
|
|
Flash | Exhaust | Ignite |
| Runes |
|
|
Sorcery |
|
|
Resolve |
|
|
Inspiration |
|
|
Domination |
|
|
Precision |
| Item Specs |
|
|
|
|
|
|
|
|
|
|
|
|
|
|
|
|
|
|
|
|
|
|
|
|
|
|
|
|
| Itemisation |
|
|
|
Starting Items |
|
|
|
First Back Frostfang should always be your first item to go for. If you can't afford the Tear, go for a mana crystal if possible. Sweeping Lens to clear vision in lane bush and river bush. You should always leave base with at least one control ward, two if possible. The first priority when going back to base is upgrading your Spellthief’s Edge into a Frostfang. This will give you 25% more mana regeneration, 10% CDR, 10 more AP, more gold on hit and will be able to place wards when the quest is completed. Getting your Tear of the Goddess on your first back is huge as well. You will slowly be able to stack it and have more mana when you hit the mid game with Manaflow Band. If you can’t afford the tear, buy your boots, they will help you poking and sidestepping lane abilities. It is important to buy one or two control wards every back, as a control ward can keep your side safe until it’s killed. |
|
|
|
Level 9 Allows you to clear vision in a larger area, to secure vision on objectives. |
|
|
|
Core Mid-Game Eye of the Watcher mixed with Oracle Alteration will allow you to ward the map efficiently and take vision control over the river and objectives. Boots of Mobility will allow you to rejoin your team quickly after going back to base or warding. Again, whenever you’re heading back to base, be sure to grab control wards, as they are one of the best items in the game for only 75 gold. Even if you have one placed down, don’t be scared to place another one down if it’s placement is better and more useful to your team. In term of teamfighting, getting redemption will give a big advantage to your team. AoE heal to your allies and AoE true damage to your enemies. It will also empower your heals, so all around, a great team fighting item. |
|
|
|
Healing Items Redemption (10% CDR, 200 health, 10% healing & shielding power): This item is quite hard to use properly to maximise its potential. It’s definitely a good item to turn a fight around or even to reset after a late game skirmish. You’ll be almost back on full health while the other team won’t be. This item can also be used outside of fights to help secure A 1v1 top lane or to save a dying teammate, it doesn’t have to be used always in teamfights. Ardent Censer (60AP, 10% CDR, 10% healing & shielding power): Ardent Censer is a great item for attack speed champions like Varus and Kog’Maw. It does increase both users attack speed and grant them bonus on hit damage, all based on level. It’s a great item to merge with redemption as it will make your heals peak really high. Mikael’s Crucible (10% CDR, 40MR, 20% healing & shielding power): Mikael’s Crucible is pretty much a team QSS in term of utility. You can use it to cleanse yourself from Crowd Control or keep it to save an ally under crowd control. This item is somehow situational, because it relies on the enemy team to be CC heavy, like Thresh, Maokai, Alistar or Leona. The stats on the item are good nonetheless. Athene’s Unholy Grail( 30AP, 30MR, 10% CDR): As Nami, your Ebb and Flow synergizes extremely well with Mikael’s Crucible, as it deals damage and heal at the same time, granting you blood charges relatively easily. |
|
|
|
Ability Power Items Seraph Embrace (50AP, 10% CDR, 1400 mana): Amazing item on Nami, if you buy the Tear of the Goddess early. It brings you a large mana pool, ability power and a personal shield in case you get jumped on by an assassin. It also refunds 25% of your spent mana, allowing you to throw in more heals before running out of mana, if you ever. Rabadon Deathcap (120AP, 40% AP): Great late-game item if you’re surviving through long teamfights. It will increase your damage and heals and will definitely make a good increase in your heals as your AP ratios are high. Morellonomicon (100AP, 400 mana): Situational item, where they have a lot of healing and sustain, like a Soraka for the sustain and Vladimir. Grieving wounds will shut down most of their power and give you an edge in fights. It also has very good stats for Nami: AP and mana. |
|
|
|
Defensive Items Locket of the Iron Solari(30AR, 60MR): Great teamfighting item that synergizes well with tank items, as it scales off health. It can serve to protect a carry getting engaged on, to mitigate some damage in 5v5 fights or to reduce AoE damage on your team. Zz’Rot Portal: In the same lines as the Banner of Command, great pushing item to put attention to the side lanes. Great defensive stats. Frozen Heart: Perfect item versus full AD teams in term of survivability. It grants you a lot of armor and will definitely keep you alive when you get engaged on. |
| Final Builds |
|
|
|
Tanky itemization that will still allow you to efficiently heal your whole team with AoE redemption and a big mana pool. |
|
|
|
Crowd control and magic resist focused build. Big mana pool and mixed resist. |
|
|
|
Great build path if your adc gets first blood to allow him to carry his lead forward. |
| Early Game |
|
|
|
In-game, |
|
|
|
To keep your carry in a straight line to success, keeping good vision in the river is definitely a must. On left side, keeping a control ward in the tri-bush will be the best 75 if you can keep the wave pushed or even as you will have vision of a potential flank at all times. You can then easily drop a ward in the river-bush or even in the enemy’s jungle to have deep vision of what’s to come. On the right side, keeping a pink ward in the river bush will be more contestable, but nonetheless a very valuable vision. Dropping a ward in the tri-bush will also allow you to see potential ganks from the red buff or mid lane. If your lane is pushed in and you have vision of the jungler top, as the support, you should always go for a deep ward on the jungler’s bottom buff or close-by as it will keep your team alert of the jungler’s position for a long time, from his top lane gank. |
|
|
|
Nami’s a great laner, but less of a roamer pre-6. You can easily run to mid-lane if your carry has some sort of crowd control to land your Aqua Prison, which will either result in a summoner blown or a kill. As your kit allows better kiting, helping your jungler when he’s skirmishing the enemy jungler will give him a lot of damage enhancement if you can reach him in time. |
| Mid Game |
|
|
|
The Mid Game usually starts when the first tower falls down and the map starts to open. As a support player, your main task on the map at that time is to clear vision and place vision around upcoming objectives like Dragon, Herald and Baron. Make sure you get assistance from your ADC or jungler when dewarding objectives as they usually will have a lot of wards and your attack speed won’t be enough to clear them all alone. Warding offensively in the enemy jungle is really beneficial if you are enough ahead of the enemy team, as you will see people heading towards objectives from a deeper point. Going for deep wards when behind isn’t something you should go for in the Mid Game. |
|
|
|
Nami’s number and items are usually pretty great when Mid Game skirmishes happen. You will most likely have your tear, redemption and started building your next item. Support are arguably the strongest team-fighters at this point in the game item-wise. Your redemption is an awesome item that will enhance any fights in your favor. When your team is ahead, you can be your team’s engage if you are fighting in the jungle or if someone is caught out. Your ultimate is quite easy to dodge, but in the jungle, the pathing to exit is longer, increasing your chances of hitting enemies. Throwing your Redemption’s timing can be tricky in term of effectiveness. I usually send it out when the enemy engages my team with their tank, as a lot of carry damage is going to go through in the next 1-2 seconds, so Redemption can negate it and damage their tanks as well. |
|
|
|
This moment of the game is also when you will start building defensive items if their team is full AD, has fed AP carries or a lot of crowd control. The dream is to build full support and AP, but keeping yourself alive to keep your team alive is more important. Look at the list of items to see what can be built in most situations! |
| Late Game |
|
|
|
The Late Game usually begins when one of the inhibitors falls down. The later stages of the game are crucial as the slightest mistake can lead to a big objective lost. Your role in the Late Game is to be your jungler’s buddy and follow him around to place vision down and clear vision. The two main places where fights will happen for an objective will be Baron or Elder. You want to have the closest to respawning to be the one you focus on. Be sure to ward with your team, as your death can easily lead to securing Baron. |
|
|
|
Late Game team-fights are more organized than Mid-Game skirmishes. It will be harder for you as a caster to have a big impact on the fights. Your main goal is to empower your auto-attack based carries with your Tidecaller’s Blessing, try and look for a bubble on assassins diving your team or CC’ed targets, while staying in the backline safely. Try and heal your tanks as much as possible so they can soak damage, while you damage their front line with bounces. For your ultimate, it is most effective to use when people are clustered together as it will most likely hit most of them or force sums out. |
|
|
|
Closing out games is a harder task than it seems. Deciding what to do during every possible scenario is a hard thing. Getting a pick on a carry or the jungler can lead to an opportunity to do Baron, while killing a tank may lead you to take an inhibitor. Whatever decision you make, make sure your whole team commits to it, as you don’t want two people pushing mid, two heading for Baron and one for Elder. Teamwork make the dream work (: |
| 1 |
|
|
✔ Melee ✔ Stun ✔ Heal |
|
|
|
✔ Ranged ✔ Silence ✔ Heal |
|
| 2 |
|
|
✔ Melee ✔ Stun ✔ Heal |
|
| 3 |
|
|
✔ Melee ✔ Stun ✔ Heal |
|
| 4 |
|
|
✔ Melee ✔ Stun ✔ Heal |
|
| 5 |
|
|
✔ Melee ✔ Stun ✔ Heal |
|
|
|
✔ Melee ✔ Stun ✔ Heal |
|
| 6 |
|
|
✔ Melee ✔ Stun ✔ Heal |
|
|
|
✔ Melee ✔ Stun ✔ Heal |
|
|
|
✔ Melee ✔ Stun ✔ Heal |
|
| 7 |
|
|
✔ Melee ✔ Stun ✔ Heal |
|
|
|
✔ Melee ✔ Stun ✔ Heal |
|
|
|
✔ Melee ✔ Stun ✔ Heal |
|
| 8 |
|
|
✔ Melee ✔ Stun ✔ Heal |
|
|
|
✔ Melee ✔ Stun ✔ Heal |
|
| 9 |
|
|
✔ Melee ✔ Stun ✔ Heal |
|
| 10 |
|
|
✔ Melee ✔ Stun ✔ Heal |
|
|
|
✔ Melee ✔ Stun ✔ Heal |
|
| F.A.Q |
|
Q:
What is this section for? |
A:
If you've got any questions for me, please let me know in the comment section, or private message me. Your question and my answer will feature here in this FAQ. There's no such thing as a silly question! |
| Outro |
|
|
Well, that's all! I hope this guide helps you play Credits: + jhoijhoi for coding the guide and making the graphics Until next time! Kryptid 02/07/18 |


 Twitter
 Facebook
 Twitch
You must be logged in to comment. Please login or register.