


Not Updated For Current Season
This guide has not yet been updated for the current season. Please keep this in mind while reading. You can see the most recently updated guides on the browse guides page
x
 Jungle Taric: The True Power of Gems [10.6]
Follow

46
3
 133,698
Views
133,698
Views
 10
Comments
10
Comments
46
3
133,698
Views
10
Comments
 Taric Build Guide By Dexiron
133,698
Views
10
Comments
Follow
x
Did this guide help you? If so please give them a vote or leave a comment.
You can even win prizes by doing so!
Vote
Comment
I liked this Guide

I didn't like this Guide
 Thank You!
Your votes and comments encourage our guide authors to continue
creating helpful guides for the League of Legends community.
Recommended Items


Runes: Glorious
1
2
3
4
Inspiration


Precision


+10% Attack Speed
+9 Adaptive (5.4 AD or 9 AP)
+6 Armor


Spells:
1
2
Dueling
![]()
![LoL Summoner Spell: Challenging Smite]()
![LoL Summoner Spell: Flash]()


Challenging Smite

Flash

Items
Example Builds
![]()

Glacial
![]()
Aftershock
![]()
Press the Attack
![]()
Ability Order

Bravado (PASSIVE)
Taric Passive Ability


Threats & Synergies
 Threats
 Synergies
Extreme
Major
Even
Minor
Tiny
 Show All
None
Low
Ok
Strong
Ideal
Extreme Threats
Ideal Synergies


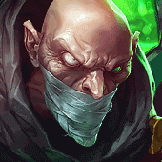
Fizz
AP, hard to gank, and his R can lock you down. Just hope he doesn't get fed and try to counter gank. Engage after he uses his spells.


Thresh


 Synergies
Ideal
Strong
Ok
Low
None
Thresh


Champion Build Guide
Rune Selection
Shards:
* Delayed Use
|
|
Inspiration • Crowd Control • * Engage Mobility |
|
Precision • Damage Easier Itemization Mana Sustain |
|
Resolve • Durability Healing Dueling |
|
|
|
|
|
|
|
|
|
|
|
|
|
Sorcery (Secondary Only)
|
|
Mobility Damage |
Take Highlighted Runes for Secondary. |
 Full Rune Breakdown
Primary//Secondary:
|
Inspiration//Precision Matchup: Easy (ex. Enemies: AD or Mixed Damage profile Allies: Lack engage ( Precision//Sorcery Matchup: Hard (i.e. Enemies: Tanks or high CC Allies: Need DPS ( |
Resolve//Precision Matchup: Hard (ex. Enemies: Strong engage (easy to Allies: Need Tank/Healer ( Precision//Resolve Matchup: Hard ( Enemies: Any. Play for matchup. Allies: Any ( |
L3gislacerator's Pink Diamond is a fantastic and beautiful guide on Taric jungle as well! His guide currently features the Aftershock playstyle.
See Lightrocket2's Welcome to the Gemshow for more about Omnistone and the true strength of Taric jungle!
Mechanics
Micro
|
P - Bravado: This gives Taric his insane early damage. It gives two empowered autos that also reset your cooldowns and grants a stack of |
|
Q - Starlight's Touch: Your most used ability because 2 empowered auto attacks reset its cooldown and add charges. Since it also costs the most mana, we want to use it the least. You actually power spike at level 4 (sometimes 3) with your second point in Q. Leveling Q only gives you more maximum charges, so put 2 points in it and max E (and a couple more points in W) before finishing. If you're ever out of range to attack an enemy, you can always just auto the nearest target and Q spam to heal your allies. |
Starlight's Touch
|
W - Bastion: Small shield and an armor buff to an ally, huge utility. Since all your abilities also get cast from your Bastion target when in range, you can pull off some crazy ganks, saves, and teamfights. Proxy stuns, long range healing, and guarantee your ult on a single target. Ganks are much easier with W already cast on your laner. You can prep a gank by casting it in base as well. |
Bastion
|
E - Dazzle: Your only damaging spell. With enough practice, you can get hit a good 80%+, making ganks easier and easier. Double Stunning also takes a lot of practice, and you can't expect a non-Taric player to know how to micro with it. During a gank you often want to just wait to stun. Let them 'cc themselves' by trying to dodge. Then get a Glacial Augment auto off and practically guarantee at least a Flash. Learn how to zig-zag, and you can force enemies to dodge a certain direction by shooting it slightly off target. |
Dazzle
|
R - Cosmic Radiance: There are so many uses for 2.5 seconds of invulnerability: tower dives, counter engage, turning off of Baron, objective steals, even ending a game without minions. Be sure that your enemy can't just run away when they see it come down. Use Righteous Glory, Flash-E, Chilling Smite, anything to teamfight on your terms. Using this spell offensively is always the best situation. Run down carries, tower dive, counter engage, turn off Baron, etc. Since there is also a 2.5 second channel, sometimes it's best to cast R without W on a target you're trying to save and just running for them. |
Cosmic Radiance
Items
Core Items
Taric jungle excels with multiple item classes, so the key to this playstyle is decision making. Base your Items on your Runes, allies, and enemies. Always note win conditions. Which champions scale? Who should you buff or counter? How can you patch weakness in your comp and exploit the enemy's? There are literally quintillions of team combinations/matchups, so every game presents a unique situation.
 Oracle Lens- vision denial, knowledge of enemy vision
Use the Trinket Swap trick (place a ward around 0:45, recall, and buy Oracle Lens) to maximize early intel. You can sweep vision on your first gank to avoid wasting time, blackout enemy vision as you take Scuttle or invade, or deny early intel if you suspect a part of your jungle is warded. You can continue swapping trinkets as the game progresses.
Hunter's Talisman- mana [+++]
Optimal clear speed. Stay low mana to increase mana regen.
Stalker's Blade (Chilling Smite)- jungle clear [+], CC [+], MS [+]
We use Chilling Smite to chase, land the stun more easily, and sometimes to escape. It procs Approach Velocity and greatly increases the likelihood that you will land a stun and secure a kill during a gank.
Skirmisher's Sabre (Challenging Smite)- jungle clear [+], DPS [+], DPS debuff [+]
If you are in a tough matchup, you fall behind to an invading jungler, you took Nimbus Cloak, enemies engage but have no disengage, and/or your laners have enough engage and CC, you can take Red Smite for the combat stats. It is the better choice for dueling, but not necessarily ganking.
Mercury's Treads- MS [++], MR [+], Anti-CC [+]
Despite Taric's armor scaling, his status as the most kitable champion in the game makes Mercs highly attractive.
Ninja Tabi- MS [++], AR [+], Anti-AA [+]
If the enemy team has low CC or AP or has multiple Marksmen or Attack Speed melees, Tabis are the better buy.
Mobility Boots- MS [+], MS out of Combat [++++]
If you need to get ganks off in the early/midgame, Mobis can practically guarantee success. This can get a scaling ally snowballing, but it comes with clear risks.
Enchantment: Cinderhulk- HP [++], DPS [+], jungle clear [+++]
This item became dominant in 10.4. The Presence of Mind mana fix and farm-jungle buffs made rushing Cinderhulk ideal in most cases. One trick is checking over unwarded walls and brushes for camps and enemies using the Fire Nova (much like Aftershock can with champions).
Tank
Tank
Support
Support
DPS
DPS
Additional Options:
Seeker's Armguard- AR [++], healing [++]
This is a very cost effective way of getting AR and AP. In games where you are going a frontline healer style (especially without Revitalize), you can sit on this item until super late game and then either turn it into Zhonya's Hourglass or sell it for a different finished item.
Zhonya's Hourglass- healing [+++], active[++], AR [++]
Completing this item loses the cost efficiency of Seeker's, but if you have Perfect Timing, this is not as big of an issue. Finishing gives you a slightly stronger heal and refreshes the Zhonya's active (regardless of Stopwatch use). There are many ways to use this active. You can use it immediately after casting Cosmic Radiance to guarantee completion. You can use it before casting R to have a 2.5 stasis, 2.5 channeling, 2.5 invulnerability chain. Or you can use it out of sync completely with R and have two very powerful teamfight spells.
Guardian Angel- DPS [++], passive [++], AR [++]
The passive on this item has lots of potential depending on team comps. If you are stacking DPS items, this can enable full diving the back while holding Cosmic Radiance. Your team has a 4s and 1.5 of your health bars to reposition, or you can effectively zone a backline out of a fight. Again, Perfect Timing makes this cost efficient.
Rod of Ages- HP [+++], healing [++], mana [++], self-healing [+]
Another non-Revitalize healing option. It doesn't deliver the utility of other items, but the raw stats translate well into late game. The biggest issue with Catalyst of Eons in the jungle is that you aren't taking damage from champions for most of the game (unlike Top), so you don't get as much mana as you would expect.
Dark Seal- healing [+], mana [+]
If you can sneak a Dark Seal into your build early, there really is no reason not to do it. It is the cheapest way to swap your Adaptive to AP, it has extreme potential for value, and you have a low risk of dying if you play correctly. If you don't urgently need an item completion, I recommend finding space for this item.
Taric jungle excels with multiple item classes, so the key to this playstyle is decision making. Base your Items on your Runes, allies, and enemies. Always note win conditions. Which champions scale? Who should you buff or counter? How can you patch weakness in your comp and exploit the enemy's? There are literally quintillions of team combinations/matchups, so every game presents a unique situation.
Use the Trinket Swap trick (place a ward around 0:45, recall, and buy
Optimal clear speed. Stay low mana to increase mana regen.
We use Chilling Smite to chase, land the stun more easily, and sometimes to escape. It procs
If you are in a tough matchup, you fall behind to an invading jungler, you took
Despite Taric's armor scaling, his status as the most kitable champion in the game makes Mercs highly attractive.
If the enemy team has low CC or AP or has multiple Marksmen or Attack Speed melees, Tabis are the better buy.
If you need to get ganks off in the early/midgame, Mobis can practically guarantee success. This can get a scaling ally snowballing, but it comes with clear risks.
This item became dominant in 10.4. The
Tank
Tank|
|
Remember, because of Taric's scaling, 70 AR has a free |
Support
Support|
|
Considering these items are normally built on supports, they cost very little and do a whole lot. I especially recommend taking |
DPS
DPS|
|
Taric's bizarre Attack Speed scaling allows him some unique DPS choices. However, if you can't get into auto-attack range, you deal no damage. Taking these items depends on both teams' mobility and whether or not an enchanted carry would outperform your DPS. |
Additional Options:
This is a very cost effective way of getting AR and AP. In games where you are going a frontline healer style (especially without
Completing this item loses the cost efficiency of Seeker's, but if you have
The passive on this item has lots of potential depending on team comps. If you are stacking DPS items, this can enable full diving the back while holding
Another non-Revitalize healing option. It doesn't deliver the utility of other items, but the raw stats translate well into late game. The biggest issue with Catalyst of Eons in the jungle is that you aren't taking damage from champions for most of the game (unlike Top), so you don't get as much mana as you would expect.
If you can sneak a Dark Seal into your build early, there really is no reason not to do it. It is the cheapest way to swap your Adaptive to AP, it has extreme potential for value, and you have a low risk of dying if you play correctly. If you don't urgently need an item completion, I recommend finding space for this item.
Early Game
Strategy
Video: Scuttle Aggression
First Clear
Taric is an incredibly versatile early game jungler. This is because of his explosive 1v1 (to the point that allied Priority is not as important as other junglers), fast clear (on par or faster than meta junglers), ability to power farm or solo dragon, and moderate early gank potential. Your options are: 1v1, gank, countergank, or power clear. You also can decide to go leashless, allowing your laners to apply pressure and denying difinitive intel.
1v1: Here we use Taric's early-game power to kill the enemy jungler away from the lanes. Given how easily you win most matchups, this option has a high probability of getting you an early lead. If you can't find the enemy jungler, you can still invade aggressively or gank. Routes that quickly take both buffs are best for this, as often you need the mana, DPS, and slow to secure the kill, continue the skirmish, and/or clear additional camps.
Gank/Countergank: Depending on how fully you clear and how easily you can gank, this can get multiple people on your team ahead. However, revealing yourself early on the map can also sacrifice tons of pressure elsewhere. For this reason, a gank or countergank that puts you in a winning position requires intel on the enemy's route and lane states to act as predicted. Choose the route that gets you to a vulnerable lane.
Power Clear: This option means that both the 1v1 and ganks are unlikely to succeed. By no means does a power clear put you behind, it just doesn't get anyone ahead. If your laners can survive with no jungle pressure, this is the safest way to get to the mid-game. Taric has a true full clear starting Red or Blue. This also means you can get a 2nd Krugs spawn before the first Dragon. If you don't get invaded during your first clear, you can continue the power clear and prevent future invades as well.
TO BE UPDATED SOON
Video: 2 Buff, Countergank
|
Play Aggressive. Early ganks and invades almost always pay off. Even if you trade Flashes, your Hexflash makes it a winning trade. You can win nearly every 1v1 and 2v2 with your mid/top. This relies on early intel, so warding the enemy's start and using the Trinket Swap trick are important. Stay Low Mana. |
Track the Enemy Jungler. • Taric has an incredibly strong level 2 (and levels 3, 4). Tough early matchups are • Both Buffs are important to Taric. If you can secure both of yours and even one of your opponent's, your second clear becomes very easy. |
Video: Scuttle AggressionFirst Clear
Taric is an incredibly versatile early game jungler. This is because of his explosive 1v1 (to the point that allied Priority is not as important as other junglers), fast clear (on par or faster than meta junglers), ability to power farm or solo dragon, and moderate early gank potential. Your options are: 1v1, gank, countergank, or power clear. You also can decide to go leashless, allowing your laners to apply pressure and denying difinitive intel.
1v1: Here we use Taric's early-game power to kill the enemy jungler away from the lanes. Given how easily you win most matchups, this option has a high probability of getting you an early lead. If you can't find the enemy jungler, you can still invade aggressively or gank. Routes that quickly take both buffs are best for this, as often you need the mana, DPS, and slow to secure the kill, continue the skirmish, and/or clear additional camps.
Gank/Countergank: Depending on how fully you clear and how easily you can gank, this can get multiple people on your team ahead. However, revealing yourself early on the map can also sacrifice tons of pressure elsewhere. For this reason, a gank or countergank that puts you in a winning position requires intel on the enemy's route and lane states to act as predicted. Choose the route that gets you to a vulnerable lane.
Power Clear: This option means that both the 1v1 and ganks are unlikely to succeed. By no means does a power clear put you behind, it just doesn't get anyone ahead. If your laners can survive with no jungle pressure, this is the safest way to get to the mid-game. Taric has a true full clear starting Red or Blue. This also means you can get a 2nd Krugs spawn before the first Dragon. If you don't get invaded during your first clear, you can continue the power clear and prevent future invades as well.
TO BE UPDATED SOON
|
Bot Gank (Blue Side) [2:12]: Red-Raptors-(Bot/Mid) (Red Side) [2:12]: Blue-Gromp-(Bot/Mid) Intel: can Priority: any Matchup: losing or any Bot GankRed Invade (Blue Side) [2:25 R...]: Blue-Enemy Red-(Ambush) Intel: enemy starts Blue and possibly takes Wolves (ward), watch your own Red Priority: ally, position towards closer laners Matchup: any (win with Red steal) Red Invade |
2 Buff [2:48 B-R][2:40 R-B]: Buff-Buff Intel: minimal (watch enemy laners) Priority: even or enemy (risky) Matchup: winning or even 2 Buff3 Camp [2:40](2:56): Blue-Wolves-Red Intel: enemy 3+ camp start (ward bot river blue side or Raptor brush red side) Priority: ally or even Matchup: winning 3 Camp5 Camp [3:40]: Blue-Gromp-Wolves-Raptors-Red-Scuttle Intel: wards on your Red side to watch for invades Priority: enemy or even Matchup: any, especially losing Power Clear |
Video: 2 Buff, Countergank
Mid Game
Pathing
1. Identify Allied and Enemy Win Conditions
Make use of your game knowledge. Which champions and matchups make a lane an easy target? Having Varus and Alistar bot lane means plan to gank when they hit 6. Try to snowball a split pusher like Nasus early. Don't give an enemy Shyvana alone time bot side. Coordinate with a roaming mid... etc.
2. Watch the Waves
This is the easiest way to know where you should be pathing. Always keep an eye on the positions of the lanes. If your bot lane shoves, the wave will bounce back, and you could head there for a gank. If your top laner's wave gets frozen on the enemy side, you might want to look to countergank.
3. Track the Enemy Jungler
As soon as they show on the map, you should count the number of camps they cleared. You will be able to guess where they still have camps up, and what their next path will be. Make use of Scuttle and Buff timers as well. You then can choose to match their pressure or counter it cross-map. Invades are also an option, but be sure your laners can get to you in time if it goes wrong.
Ganking
Video: E-Flash Gank, Proxy Countergank
With Cosmic Radiance, you can easily turret dive as well. It's best to cast it right before you take the first tower shot, as it's better to block the later, stronger ones. Additionally, if your laner is the one in position to finish the kill, you can auto minions or even the tower in order to spam heal.
Once Turbo Chemtank is completed (at the end or after laning phase), this becomes your go button (in addition to Flash and Hexflash).
Objectives
You really want to prioritize objectives because you have such a strong 1v1 and skirmish. Stay on top of Scuttle Crabs, Dragons, and Rift Herald. All of them are very useful for Taric. The key to good objective control is to budget your mana. Going oom in this context isn't optimal (as opposed to your first clear) because there is a greater chance the enemy can contest. Your neutral objective control also benefits from Hexflash because you can Hexflash in (to avoid vision and solo) or out (if things go poorly).
Itemizing
Stalker's Blade - Cinderhulk (target 10:00) [99%]
In 10.4+, I've only ever not completed this item first to get a desperation Ardent Censer (which saved the game) and to full buy Turbo Chemtank in a snowball. You can obviously grab other components at your discretion, but probably the most efficient build is just Cinderhulk and Boots 2.
Power Spike: Turbo Chemtank (target 18:00) [25%], Dead Man's Plate (target 19:00) [15%], Death's Dance (target 22:00) [15%], Abyssal Mask (target 20:00) [15%], Knight's Vow (target 17:00) [10%], Redemption (target 16:00) [5%], Zeke's Convergence (target 17:00) [5%], Other (target 18:00) [5%].
You've come online. Be extremely aggressive with picks, and take control of objectives. Communicate that it's time to teamfight, and keep an eye out for vulnerable splitting ADC's. With S10 Presence of Mind, you can essentially build any item first, but you should understand exactly why you're building how you are.
3rd Item: Situational (target ~25:00)
Here is where we differentiate into a pure tank, fighter, or support style. Against even damage spreads, I usually take my primary MR item third Spirit Visage / Abyssal Mask. Take Knight's Vow or Athene's Unholy Grail to support a fed ally. Start building towards Death's Dance or Titanic Hydra if you're going the DPS route, which is better when you're fed or your team lacks damage. See item synergies above and dysergies to avoid "losing to the shopkeeper" - Shakarez.
Finishing a Build: Moving to mid/late game, you can clearly identify allied and enemy carries and damage profiles, which tells us how to choose resistances (when in doubt, lean towards armor). As general rules, we can't double up on DPS items or totally neglect HP. Look at the staple items I listed above, and continue building synergies and rounding out your build. I find myself building a Cold Steel item most of the time Frozen Heart, Randuin's Omen, or Thornmail. Can you establish a hypercarry with Zeke's Convergence or Ardent Censer? Would Locket of the Iron Solari or Redemption help your team survive burst? Most games end before you reach full build, so choose value over luxury.
1. Identify Allied and Enemy Win Conditions
Make use of your game knowledge. Which champions and matchups make a lane an easy target? Having Varus and Alistar bot lane means plan to gank when they hit 6. Try to snowball a split pusher like Nasus early. Don't give an enemy Shyvana alone time bot side. Coordinate with a roaming mid... etc.
2. Watch the Waves
This is the easiest way to know where you should be pathing. Always keep an eye on the positions of the lanes. If your bot lane shoves, the wave will bounce back, and you could head there for a gank. If your top laner's wave gets frozen on the enemy side, you might want to look to countergank.
3. Track the Enemy Jungler
As soon as they show on the map, you should count the number of camps they cleared. You will be able to guess where they still have camps up, and what their next path will be. Make use of Scuttle and Buff timers as well. You then can choose to match their pressure or counter it cross-map. Invades are also an option, but be sure your laners can get to you in time if it goes wrong.
Ganking
|
|
E-Flash engage: Always an option when the cooldowns are up. If they are in kill range, this is usually the way to go. Otherwise, you can almost guarantee to at least trade an enemy flash for yours. This is always good because you have Hextech Flashtraption, which opens up other opportunities. | OR |
|
Hexflash Engage: Either to avoid a ward, pop out of a brush, or get a better angle. My favorite locations to do this are: Raptors to mid, through tower range to bot/top, and the utility wolf hexflash. |
|
|
Flashless Engage: the optimal "full combo" is Chilling Smite > Auto-Attack (Glacial Augment) > Dazzle. We use our soft CC to land our hard CC. Use the Zig-Zag technique to hit more stuns. You may want to throw in a Bastion if your ally is in range just to have your first Auto-Attack empowered and to heal immediately. |
OR |
|
Proxy Engage: If your laner is baiting or engaging already, get your W on them ASAP. This is to immediately proxy a stun in combination with their engage or to start healing. |
|
☓ ∞ |
Just Auto: If your gank target is caught way out of position, the best way to secure a kill is to hold onto your stun and let the threat be what CC's them. As long as they continue to dodge (path inefficiently) and you can stay in range to auto, there is no need to try and potentially miss a stun that could secure their escape. Let |
Video: E-Flash Gank, Proxy CountergankWith
Once
Objectives
You really want to prioritize objectives because you have such a strong 1v1 and skirmish. Stay on top of Scuttle Crabs, Dragons, and Rift Herald. All of them are very useful for Taric. The key to good objective control is to budget your mana. Going oom in this context isn't optimal (as opposed to your first clear) because there is a greater chance the enemy can contest. Your neutral objective control also benefits from Hexflash because you can Hexflash in (to avoid vision and solo) or out (if things go poorly).
Itemizing
|
First Back: Get your upgraded Smite and Boots. If you have enough for |
Second Back: Immediately start building towards |
Third/Fourth Back: Finish your jungle item ASAP. After finishing Boots 2, we can build towards our non-jungle core item (e.x. |
[% of games built]
Finish: In 10.4+, I've only ever not completed this item first to get a desperation
Power Spike:
You've come online. Be extremely aggressive with picks, and take control of objectives. Communicate that it's time to teamfight, and keep an eye out for vulnerable splitting ADC's. With S10
3rd Item: Situational (target ~25:00)
Here is where we differentiate into a pure tank, fighter, or support style. Against even damage spreads, I usually take my primary MR item third
Finishing a Build: Moving to mid/late game, you can clearly identify allied and enemy carries and damage profiles, which tells us how to choose resistances (when in doubt, lean towards armor). As general rules, we can't double up on DPS items or totally neglect HP. Look at the staple items I listed above, and continue building synergies and rounding out your build. I find myself building a Cold Steel item most of the time
Late Game
Using Bastion: Carries, Frontline
• Keep Bastion on your carries (ADC, Mid) especially against assassins or burst comps. In addition to the armor buff, it guarantees that they will receive invulnerability and immediate healing.
• Look to swap Bastion to an ally with engage ( Gnar, Alistar, LeBlanc, Irelia). This is to proxy your stun, and give the frontline invulnerability while you follow up with the backline.
Using Cosmic Radiance: Engage, Counter, or Disengage
• As an engage tool, you can give your carries confidence to get free damage off and give your frontline enough time to chunk priority targets. Using your ult in this way usually means you're taking a winning fight, so this is how you want to use it most often.
• As a counter-engage tool, you're trying to make the fight last long enough to turn. Not chasing an enemy, but denying their full damage and using that time to heal allies back up for round 2.
• As pure disengage, you're essentially saying that the fight is lost, and you can't turn. This is always the worst-case-scenario, and it only works if you can get to a safe position within 2.5 seconds.
Warden, Vanguard, or Enchanter?
Your playstyle will change depending on your team composition and how you've itemized.
In every case, you excel at teamfighting and objective control, this is due to Taric's ability to Starlight's Touch everyone to full HP and use Cosmic Radiance to turn. Group with your team and look for control of Mid, Baron, and Dragon. You can tank turrets (with enough mana to heal). Running Presence of Mind also means that after winning a teamfight, you will always have mana to secure objectives and keep allies up (even snowball to end).
• Keep Bastion on your carries (ADC, Mid) especially against assassins or burst comps. In addition to the armor buff, it guarantees that they will receive invulnerability and immediate healing.
• Look to swap Bastion to an ally with engage (
Using
• As an engage tool, you can give your carries confidence to get free damage off and give your frontline enough time to chunk priority targets. Using your ult in this way usually means you're taking a winning fight, so this is how you want to use it most often.
• As a counter-engage tool, you're trying to make the fight last long enough to turn. Not chasing an enemy, but denying their full damage and using that time to heal allies back up for round 2.
• As pure disengage, you're essentially saying that the fight is lost, and you can't turn. This is always the worst-case-scenario, and it only works if you can get to a safe position within 2.5 seconds.
Warden, Vanguard, or Enchanter?
Your playstyle will change depending on your team composition and how you've itemized.
|
|
+ |
|
Warden (2-3 Tank Items): Frontline engage/tank. If your team is in position to follow, look to engage with Righteous Glory or E-Flash. Soak damage and lead your team forward, using Cosmic Radiance to encourage your team to fight with you. |
|
|
+ |
|
Vanguard (2 DPS Items): You are susceptible to kiting without more tank items, but you have more kill pressure against enemy carries. This generally means you are not the primary tank or healer, and you can focus on chunking the enemy backline. Mostly using Cosmic Radiance for yourself offensively to dive. |
|
|
+ |
|
Enchanter (2 Support Items): Again, less a pure tank style, better against assassins and on teams with a damage support. Play farther back, follow up on safe engage, and focus on keeping your carries protected and buffed. |
In every case, you excel at teamfighting and objective control, this is due to Taric's ability to
Pros/Cons
|
Early Game Best early 1v1 in the game (especially level 2). Strong skirmish power (2v2 and 3v3). Your ability to save allies and synergy with assassins and fighters can easily get a laner snowballing. Low health laners almost never die trying to bait because of your healing. A-tier Scuttle control due to early game power and the stun to remove resistances. Decent clear speed. Taric has mana struggles in the jungle, but taking If you can't land the stuns, which take time to learn, you look like an idiot. I believe it's one of the hardest CC abilities in the game to hit. (See the Stun Section for tips, and no one hits 100%) Taric has no mobility. Some solutions that work well are: |
Mid Game You can full heal your mid laner with W and Q while taking Raptors. Objective control is incredible. You can heal your allies to full off a dragon, or duo Baron late game. Great ganks and counter-ganks against low mobility champions. Mobile laners amplify this power ( You can scale like a fighter if you get ahead, which means being able to solo out a carry on 2 items. Fast solo Dragon potential. Can be done with enough mana/pots or blue buff. Turret dives most often work out well with Being mana hungry means the conflict with mid over sharing Blue Buff is still there. Be stingy or play around Scuttle. Enemies with |
Late Game Excels at the 'Protect the Carry' style for assassins and ADC: peeling, healing, and ultimate. You also have great synergy with Your ultimate means teamfights happen on your terms. Amazing late game against AD. Armor stacking will also increase DPS through your passive. You do well enough against AP. Double MR items are almost always Moderate/strong engage with Righteous Glory and E. Does even better with engage laners. Late game damage can fall off as compared to other fighters. You can go Taric is extremely susceptible to kiting. Without Righteous Glory, a smite, and possibly flash, any fed ADC will win the 1v1. Also, you must avoid tunnel vision in teamfights. Get your engage off, chunk a carry, and then look to see if your teammates need peel. |
Tips and Tricks
Most Common Mistake: Over-Flash
Over-Flashing is when you have an E flash set up, you're pretty close to them, but you just need that extra range that flash gives. You shoot your E, use the full flash range, and completely whiff. This happens because you tried to maximize your flash value instead of guaranteeing the stun. What you should do is channel E, picture where you need to be positioned in order to land the stun, and then flash to that point- not on top of them.
How to Hit More Stuns-
This takes practice, but I can tell you the basics. Most people when they see the stun come out will run in one direction kinda diagonally away so that they're still running away, but it doesn't connect. And most people choose to run whichever way will get them out of the stun zone quicker. If you shoot your stun slightly to the left of them, they will run right in order to escape it. So, shoot your stun and give them a second to react, then just follow their diagonal path. Better players will then zig-zag the opposite direction. If you see this happen, it's on you to react to their movement. Hopefully the first phase bought you some wiggle room so that you have enough time to keep them in the zone if they do choose to zig-zag.
The best players will not even try to "flee" in a predictable direction. They will just run around randomly. If this is the case, it's pure luck for the channel duration if you can mind game them into getting stunned.
Then there's stunning around corners. This is extremely difficult. You have to calculate where they will end up as they round the corner in comparison to where you will end up. And this can only happen if they run in a predictable path (hugging a wall/only one escape route). Otherwise, don't even try. Just save your stun for after you get around the corner.
Finally there's the flash stun over a thick wall on a moving target. This is probably the hardest because on a thick flash point, you only have a little room to choose where to flash. You have to predict where they will be, shoot your stun based off of that, then reposition your mouse to the flash point and do this all before the channel ends and the stun goes off. Again, I rarely do this one.
Raptor Heal Trick-
Any time you do Raptors, you have a chance to get a crazy number of heals to your mid laner. Cast W on your mid, and ping them to stand in range of your tether next to the Raptor wall. While they chill, you can Q heal them while auto attacking raptors. Finally, type ":)" in all chat.
"This guy's an idiot" Stun Trick-
This is only used in a close range 1v1 when you know that the enemy has flash (ie. first invade) and you're going for a finishing combo. If their flash is up and they see your stun will connect, they most likely will flash. In this case, they'd be incredibly stupid to flash because you intentionally shoot your stun directly opposite of them. Then you flash behind them so your stun is facing the right direction right before it connects. Make sure they are in kill range or else they can flash away after the stun ends.
Video Instructions
Hit More StunsRaptor Heal TrickForcing with StunsName another Jungler
Additional Theory
Additional Theory
Why does this work at all?
In a word, resets. Everything about Taric is basically gated by his auto attacks. His healing, his DPS, and his CC are all capped by how many auto's you can get off. This makes the number one priority not attack speed, but the ability to stick.
If somoneone realizes the fight is going badly for them, and you have no way to keep them there, your lack of mobility will guarentee their escape. (I have a strong feeling that Righteous Glory wil be nerfed, but PBE also has a history of coming through in other ways.)
Also, spam healing makes ganking much easier for your laners to all in (not to mention your ultimate).
Modified Tank Theory:
There is a common understanding that in order to maximize Effective Health (EH), there is a balance between HP, AR, and MR that must be maintained. Think of it like HP being the raw maximum, and armor and magic resist make each point of health more and more valuable.
On any champion with self healing, this balance gets shifted towards needing more resistances because your 'real maximum health' is raised by the healing output.
Taric does have somewhat of an incentive to build health (his heal scales with max health), but that scaling is minimal compared to how much effective health is gained in building resistances.
It gets even more complicated when considering Spirit Visage, which even though it gives less MR than Locket of the Iron Solari, the bonus 30% self-healing actually is more beneficial than the bonus MR from Locket.
In every other case, build resistances. This means Warmogs is always the wrong choice, Redemption is hardly useful, and something like Frozen Mallet is generally a waste of an item slot.
You always need a little HP to keep Dazzlin' your enemies, but build it sparingly.
Attack Speed Theory:
This one is pretty simple. The normal attack speed cap is 2.5, but since Taric's passive doubles his attack speed, he essentially hits the cap at 1.25.
From just running Legend: Alacrity, and going Inspiration//Precision, you can hit 1.08 (2.16), which is pretty close, and building one attack speed item will cap you. (Ardent Censar, Wit's End, Essence Reaver).
However, [the important part] if you take Lethal Tempo, you can overcap your attack speed. This can radically change your playstyle if you choose to build attack speed items. The infamous PantsAreDragon Rageblade, Bloodrazor, Essence Reaver becomes quasi-viable. In the realm of 'meta' jungle Taric, though. This realistically means that you can maximize the value of Ardent Censar or Wit's End.
This also increases every other stat that Taric's auto attacks are gated through: DPS, healing, and CC. However, as you can read in the Runes section, it makes ganking much less reliable, and your Righteous Glory slightly less valuable as well. But as a whole, Lethal Tempo scales you better into late game "Protect the Carry" given that you can be useful early.
Theoretical Maximum Healing:
Achieved through the AP ratio on Q, here you just build pure AP. The problem is, you are an immobile melee squishy, meaning you'll never realistically get your auto attacks off.
Theoretical Maximum Attack Speed (DPS):
Achieved through overcapping with Lethal Tempo. Build Bloodrazor, Rageblade, Nashor's, etc. This is the highest DPS you can achieve, but again, you will have to be able to get in range to use it. If you can, the heal resets may be able to keep you alive, but this build takes far too long to turn on.
Theoretical Maximum (non-healing) Tank:
This involves going Resolve and taking Aftershock. Then take Cinderhulk, Stoneplate, Spirit Visage, Thornmail, and Locket. This is very close to the play style I use, and it really only misses out on the intangibles.
A real build can blend these three ideas (favoring Tank) with Utility gained from the Inspiration tree and Righteous Glory. You can then supplement your DPS with something like Titanic Hydra or Wit's End.
Patch 7.14 was the savior of Taric. It gave him the charge mechanic on his Q, making it spammable, and making jungle Taric a possibility.
RIP OP Presence of Mind (8.1-8.7)
Taric is Glorious


 Twitch
Jungle Taric: The True Power of Gems [10.6]
You must be logged in to comment. Please login or register.